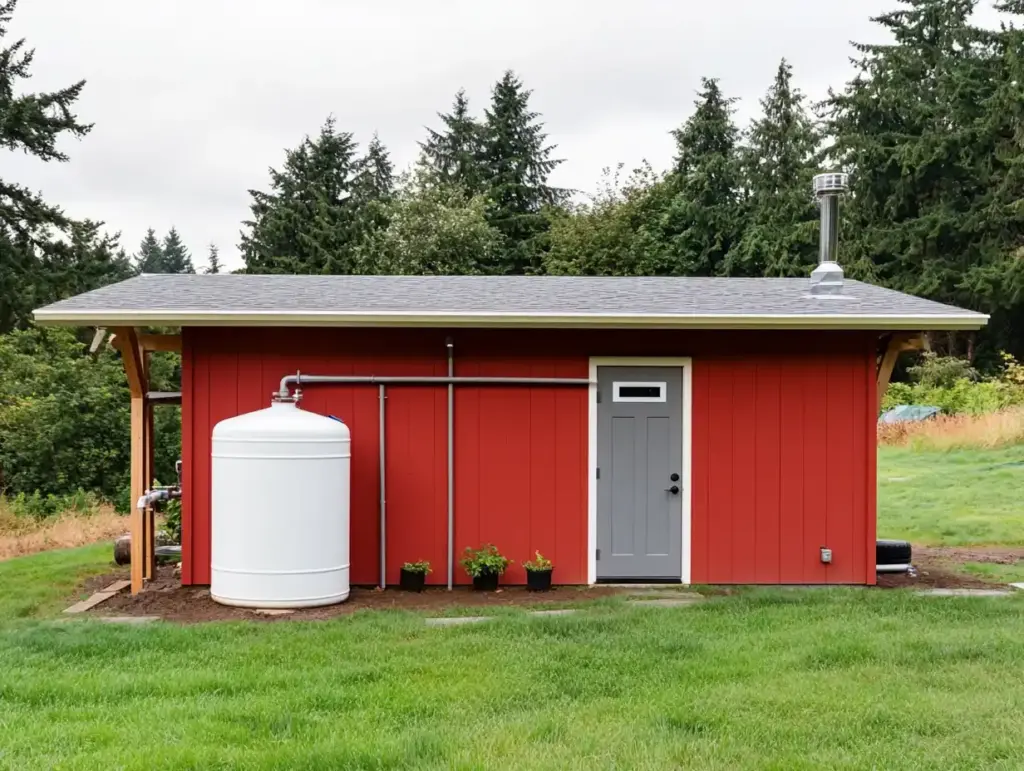
In today’s world of rising utility bills and intensifying environmental concerns, installing your own rainwater collection system is not just a sustainable choice—it’s a smart, empowering move. A thoughtfully designed rainwater collection system helps you cut down on municipal water use, supports emergency preparedness, and provides an eco-friendly source of water for everything from backyard irrigation to homestead gardens. Whether you’re looking to nurture perennial flowers that bloom from spring to fall or simply want to boost your self-reliance, rainwater harvesting is a practical, planet-friendly solution.
This step-by-step guide will show you how to build a DIY rainwater collection system using affordable, easily sourced parts like IBC totes, PVC piping, and debris filters. You’ll learn how to calculate potential water yield, set up filtration to protect your plants, and adapt your rainwater collection system to suit any season. By the end, you’ll not only have the tools to build your own system—you’ll understand why collecting rainwater is a game-changer for modern, low-maintenance gardening.
Table of Contents
💧 How Much Water Can You Harvest?
One of the first questions gardeners and homeowners ask is, “How much water can I actually collect with a rainwater collection system?” The answer depends largely on the size of your roof and the amount of rainfall in your area. Thankfully, there’s a simple formula you can use to estimate your potential water yield:
Roof square footage × Inches of rainfall × 0.623 = Gallons of rainwater collected
Even with just a single IBC tote (typically around 275–330 gallons), your rainwater collection system can make a huge impact, especially during peak gardening seasons or dry spells. And if you install multiple totes, you’ll have a highly efficient reservoir for all your outdoor water needs.
🛠️ Downspout Modifications: Directing Water Where You Need It
A successful rainwater collection system starts with one crucial detail: getting the water to flow where you want it. That means taking a close look at your home’s gutter and downspout configuration. In many cases, existing downspouts may be positioned on the wrong side of your building, far from your water storage setup.
Here’s the fix:
Simply remove and swap your gutters and downspouts to reroute water toward your IBC tote or collection area. For example, if your gutters drain toward the front of a garage but your collection system is in the back, relocating the gutters from left to right (and vice versa) will naturally reposition the downspouts without costly rerouting or extra piping.
✅ Pro Tip: Before making changes, mark your ideal collection point, ensuring it’s close to your IBC tote and on stable, level ground.
This small modification ensures that gravity does the heavy lifting, sending rainwater straight from your roof into your storage container. The fewer twists and turns in your pipework, the more efficient—and leak-free—your system will be.
🧱 Choosing the Right IBC Tote: The Heart of Your Rainwater Collection System
Your rainwater collection system is only as effective as the container that holds it all together—literally. That’s where the IBC (Intermediate Bulk Container) tote comes in. These large, durable tanks are widely used in DIY setups due to their affordability, generous capacity, and versatility.
🛒 Where to Source IBC Totes
You can often find IBC totes on local marketplaces like Craigslist or Facebook Marketplace. Look in the Farm + Garden section and search for food-grade totes. These are crucial for safety—especially if you plan to use the collected water for gardening or irrigation.
⚠️ Avoid totes that previously stored chemicals, such as herbicides or industrial cleaners. Even trace residues can harm plants or contaminate your water.
🔧 Know Your Threads: NPS vs. S60X6
When selecting a tote, pay close attention to the valve thread type:
- NPS (National Pipe Straight): Fine-threaded and compatible with 2″ PVC fittings—ideal for DIY projects.
- S60X6: Coarse threads that may require specialty adapters.
You can purchase converters or adapters online if your tote comes with S60X6 threads, but for ease, aim for an NPS-compatible tote from the start.
📏 Sizing Up Your Storage
IBC totes come in various sizes, typically:
- 275 gallons
- 300 gallons
- 330 gallons
Choose a size that fits both your space and your water needs. Many DIYers prefer 300-gallon totes—they’re a perfect middle ground and easy to transport in a standard utility trailer.
🧱 Preparing the Base: Set a Solid Foundation for Your Rainwater Collection System
A sturdy, level base is essential for the long-term success and safety of your rainwater collection system. Once filled, even a single 300-gallon IBC tote can weigh over 2,400 pounds—so a tilted or soft foundation can lead to tipping, cracking, or uneven drainage.
🛠️ Steps to Build a Stable Base:
- Level the Ground
- Use a shovel or rake to flatten the surface where your tote will sit.
- A slight tilt away from structures helps prevent unwanted runoff toward your home.
- Lay Weed Cloth
- Before placing any support, roll out weed cloth to block unwanted plant growth.
- This minimizes the chance of vegetation creeping under or around the tote base.
- Add Cinder Blocks or Wooden Planks
- Use 4 or more evenly spaced cinder blocks (or strong wooden planks) to support each corner and edge of the tote.
- Ensure all corners of the IBC tote rest squarely on a firm surface to distribute weight evenly.
- Surround with Mulch
- Apply mulch around the base to keep weeds at bay and absorb splashes from heavy rainfall.
✅ Pro Tip: Slight elevation from the blocks not only aids stability but improves gravity-fed water flow if you’re not using a pump.
With a reliable base in place, your system is ready for plumbing, filtration, and water diversion.
❄️ Seasonal Adaptation: Install a Downspout Diverter for Year-Round Efficiency
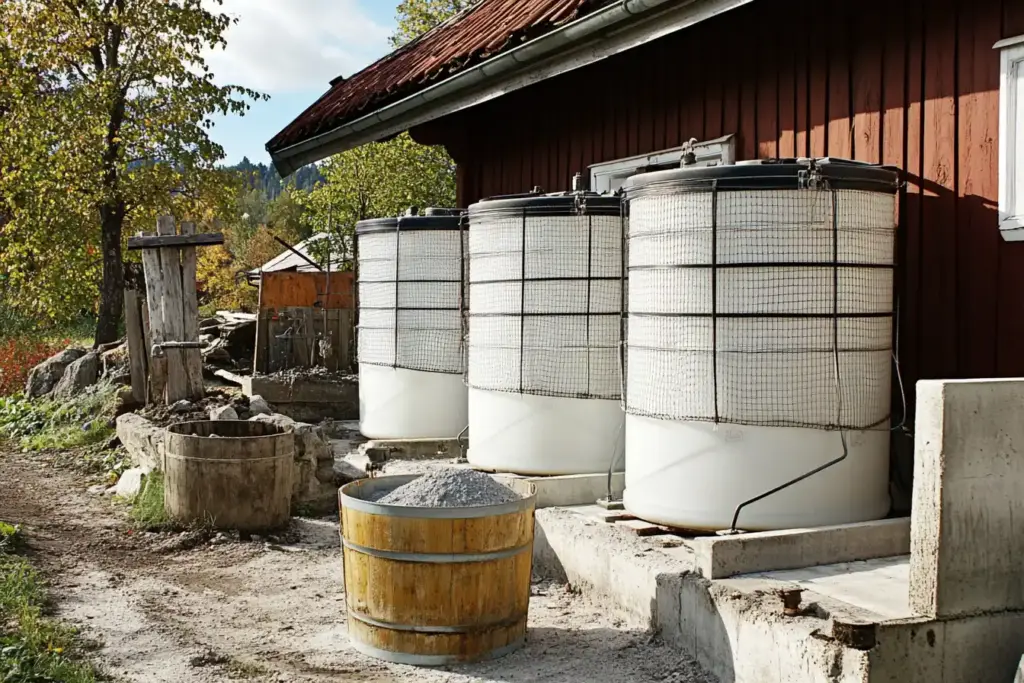
While a rainwater collection system is highly effective, it needs to adapt to the changing seasons—especially in colder climates. That’s where a downspout diverter becomes a vital component of your setup.
🌦️ Why You Need a Diverter
During warm months, you want every drop of rain directed into your IBC tote. But in winter, freezing temperatures can damage your system—water expands when it freezes, which can crack totes and rupture pipes.
A downspout diverter solves this by giving you control over where the water flows:
- In summer, the diverter channels rainwater into the collection system.
- In winter, it redirects the flow away from the tote and safely onto the ground, preventing freezing damage.
🛠️ Installation Tips:
- Use a “Y” diverter specifically designed for residential downspouts (usually 2×3″ or 3×4″).
- Mount it at a comfortable height for easy access, especially if you’ll be switching it seasonally.
- Choose a diverter color that matches your downspout to blend with your exterior.
💡 Pro Tip: Drain and disconnect your IBC tote before the first freeze if you’re in a northern climate. In warmer zones, the diverter may not be necessary, but it still adds flexibility and control.
With this simple yet smart modification, your rainwater collection system can operate efficiently all year round—without the risk of winter wear and tear.
🧹 Filtering Out Debris: Keeping Your Rainwater Clean & Flowing
No matter how efficient your rainwater collection system is, it’s only as clean as the water flowing into it. Roofs and gutters collect leaves, pollen, bird droppings, and all kinds of debris that you don’t want entering your IBC tote. That’s why multi-stage filtration is essential.
🌀 Step 1: Gutter Strainer for Large Debris
Installed directly into the top of your downspout, a gutter strainer is a simple galvanized mesh screen that catches:
- Leaves
- Twigs
- Pine needles
It’s your first line of defense to prevent clogs and protect your piping.
🍂 Step 2: Leaf Eater Filter for Medium Debris
Mounted on your downspout just below the strainer, the leaf eater uses a slanted mesh screen to capture finer materials like:
- Seeds
- Smaller leaves
- Insects
Water flows through; debris rolls off. This keeps your pipes—and eventually your tote—cleaner with minimal maintenance.
🚫 Step 3: First Flush Diverter for Pollutants
The first flush diverter is the most critical filtration component. It captures the initial surge of dirty runoff from your roof, which often contains:
- Dust
- Bird droppings
- Airborne pollutants
Here’s how it works: - Water enters a vertical PVC chamber.
- As it fills, a floating ball rises and eventually seals off the chamber.
- Once sealed, clean water flows into your IBC tote, while the dirty “first flush” is trapped below.
🛠️ Tip: Choose a diverter size based on your roof area. The larger the roof, the more runoff you need to divert before clean water flows in.
By layering these filtration stages, you ensure your collected rainwater is clean, clear, and safe for garden use—all while extending the life of your system.
🧪 Filtration Enhancements: Auto-Reset Features for Long-Term Performance
Even the best rainwater collection system can become ineffective without regular maintenance—but smart design can dramatically reduce the need for manual upkeep. That’s where filtration enhancements and auto-reset features come in.
🔄 Add a Slow-Release Valve for First Flush Reset
The key to an automated first flush diverter is a slow-release control valve. Installed at the base of your vertical PVC chamber, this small valve:
- Slowly drains the dirty first-flush water over 1–2 hours
- Resets the chamber for the next rainfall
This means you don’t have to empty the diverter manually after every storm. It’s a simple upgrade that adds major convenience.
🔧 Pro Tip: Make sure your first flush kit includes a slow-release valve, or purchase one separately. They’re inexpensive and widely available online.
🛡️ Install a Stainless Steel Pre-Filter
To protect your slow-release valve from clogging with debris or sediment, consider installing a stainless steel filter above it. This ultra-fine screen acts as a last-chance filter before water enters the valve, ensuring:
- Uninterrupted drainage
- Less frequent cleaning
- A longer lifespan for your components
Even though your system already includes multiple layers of filtration (like gutter strainers and leaf eaters), this enhancement makes your setup much more hands-off and reliable.
💡 Optional but recommended: For larger roofs or higher pollen areas, doubling up your first flush filters ensures better long-term water quality.
With these enhancements in place, your system stays clean, functional, and low-maintenance—just how a DIY setup should be.
🚿 Water Usage: Connect Spigots and Pumps for Effortless Flow
Once your rainwater collection system is operational and your IBC tote is storing clean water, the next step is getting that water where you need it—whether it’s downhill to a garden bed or uphill to a greenhouse.
🧰 Add a Hose Spigot
Start by installing a ¾-inch hose spigot at the outlet of your IBC tote. To do this, you’ll need:
- A 2″ PVC adapter with a smooth end (for gluing) and threaded end (for screwing into the tote)
- A 2″ to ¾” spigot-thread bushing
- Plumber’s tape for leak-proof connections
Once everything is connected and sealed, you can attach a standard garden hose directly to the tote.
✅ Gravity-fed flow works great for short distances or watering directly downhill.
⚡ Use a Pump for Pressurized or Uphill Flow
If you need to move water uphill or want to use a hose with sprayer attachments, a pump becomes essential. A ½ HP electric water pump is ideal for most residential setups.
Key features to look for:
- Standard garden hose fittings (¾”)
- A flow rate that matches your needs (measured in GPH or gallons per hour)
- A lift rating (vertical height) that matches your terrain
Once connected between the tote and your hose, the pump delivers consistent water pressure—perfect for irrigation, washing tools, or even small-scale drip systems.
💡 Bonus Tip: Mount your pump on a vibration-dampening pad and store it in a waterproof enclosure to extend its life.
With both gravity and pump-powered options, your rainwater collection system becomes a flexible and efficient water source for all your garden and outdoor needs.
🛠️ Customizing Your Setup: Tailor Your Rainwater Collection System to Your Environment
No two homes—or gardens—are exactly the same, which is why your rainwater collection system should be adapted to your specific roof size, rainfall patterns, and water usage goals. With a few strategic adjustments, you can maximize efficiency and ensure your system performs at its best year-round.
🏠 Match Pipe Size to Roof Area
The larger your roof, the greater the volume—and speed—of water entering the system. To avoid backups or overflows:
- Use 3-inch PVC piping for larger roof sections.
- For smaller sheds or greenhouses, 2-inch piping may be sufficient.
- Always slope pipes downward slightly to maintain smooth flow.
🌧️ Scale Your First Flush and Filtration
If your roof catches a lot of debris (e.g., under trees or in high-pollen areas), increase your filtration capacity:
- Use multiple leaf eaters or first flush diverters for separate downspouts.
- Increase the length of your vertical first flush pipe to trap more contaminated water during the first rainfall burst.
📐 A general rule: 1 gallon of first flush volume for every 100 square feet of roof surface.
🧪 Adjust Tote Capacity to Match Rainfall Expectations
In areas with frequent, light rain, smaller totes that fill quickly may be sufficient. In drier climates, opt for larger capacity or connect multiple IBC totes in series using PVC or flexible tubing. This creates a modular, expandable system that grows with your needs.
🛢️ Example: Two 300-gallon totes connected with a 2” PVC elbow allow simultaneous filling and draining.
🌱 Think About End Use
- For garden irrigation, consider a gravity-fed drip system with a pressure reducer.
- For power washing or spraying, prioritize a pump with consistent pressure.
By tailoring each component of your rainwater collection system, you’ll optimize performance and minimize maintenance—making your investment even more worthwhile.
author:✅ Conclusion: Start Harvesting the Benefits of Your Rainwater Collection System
Building a rainwater collection system isn’t just a weekend DIY task—it’s a long-term investment in sustainability, resilience, and environmental care. By choosing the right IBC tote, setting up smart filtration, and tailoring the design to your local weather patterns, you’ll create a rainwater collection system that rewards you for years to come—supporting both your garden and your wallet.
Whether you’re aiming to keep your vegetable garden thriving through dry spells, reduce household water use, or simply take greater control of your resources, a well-built rainwater collection system empowers you to do just that. It’s affordable, scalable, and—thanks to modern tools and materials—surprisingly easy to set up.
So gather your tools, make use of your rooftop, and start harvesting rain today! For more inspiration, explore our tips on composting essentials and low-maintenance garden design to maximize the benefits of your rainwater collection system year-round.
🌿 Love gardening inspiration? Follow me on Pinterest for bold plant ideas, tips, and seasonal color!
More Posts
