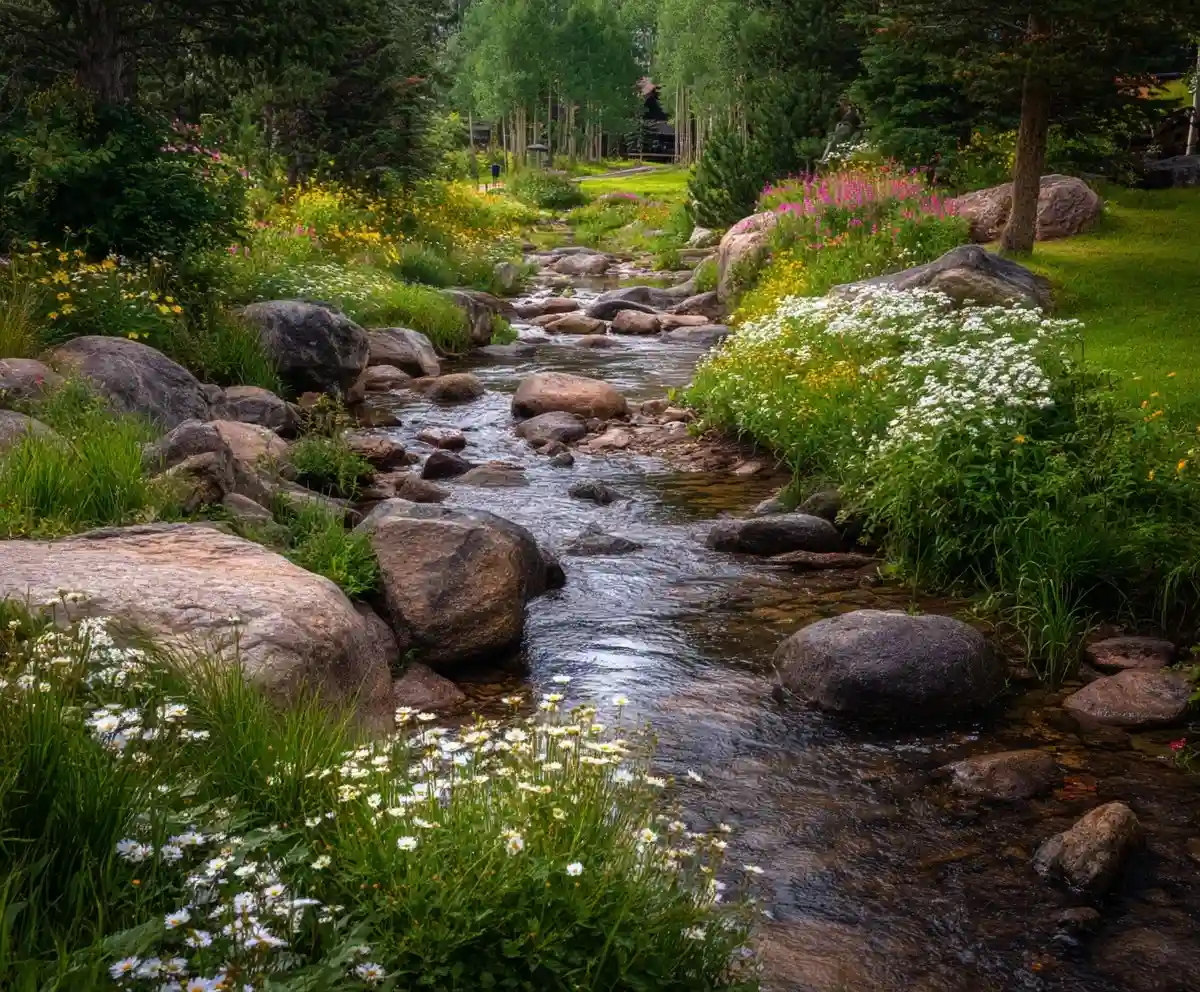
Dry creek bed designs offer more than just a fix for water runoff—they’re a creative way to bring texture, movement, and visual interest to your landscape. Whether your goal is to manage drainage or simply add a unique focal point to your garden, building a dry creek bed allows you to achieve both.
Instead of dealing with soggy spots or plain patches of lawn, you can shape an elegant rock-lined channel that mimics the natural flow of a stream. When designed well, it doesn’t just blend into your yard—it becomes the highlight of it.
This guide showcases 19 unique and practical dry creek bed ideas. From artistic accents to sustainable landscaping tricks, each concept combines form and function to help you transform your outdoor space into something truly special.
Let’s get into the best ideas for creating a dry creek bed that’s as beautiful as it is effective.
Table of Contents
1. Natural Riverstone Warning
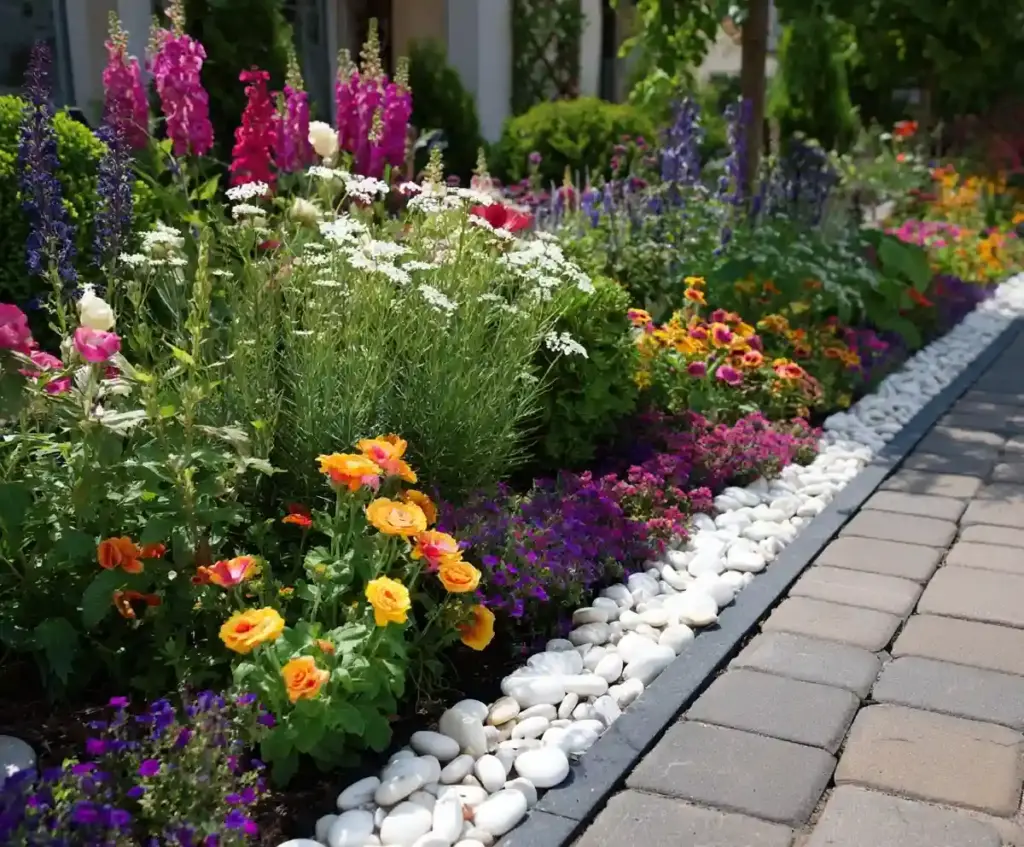
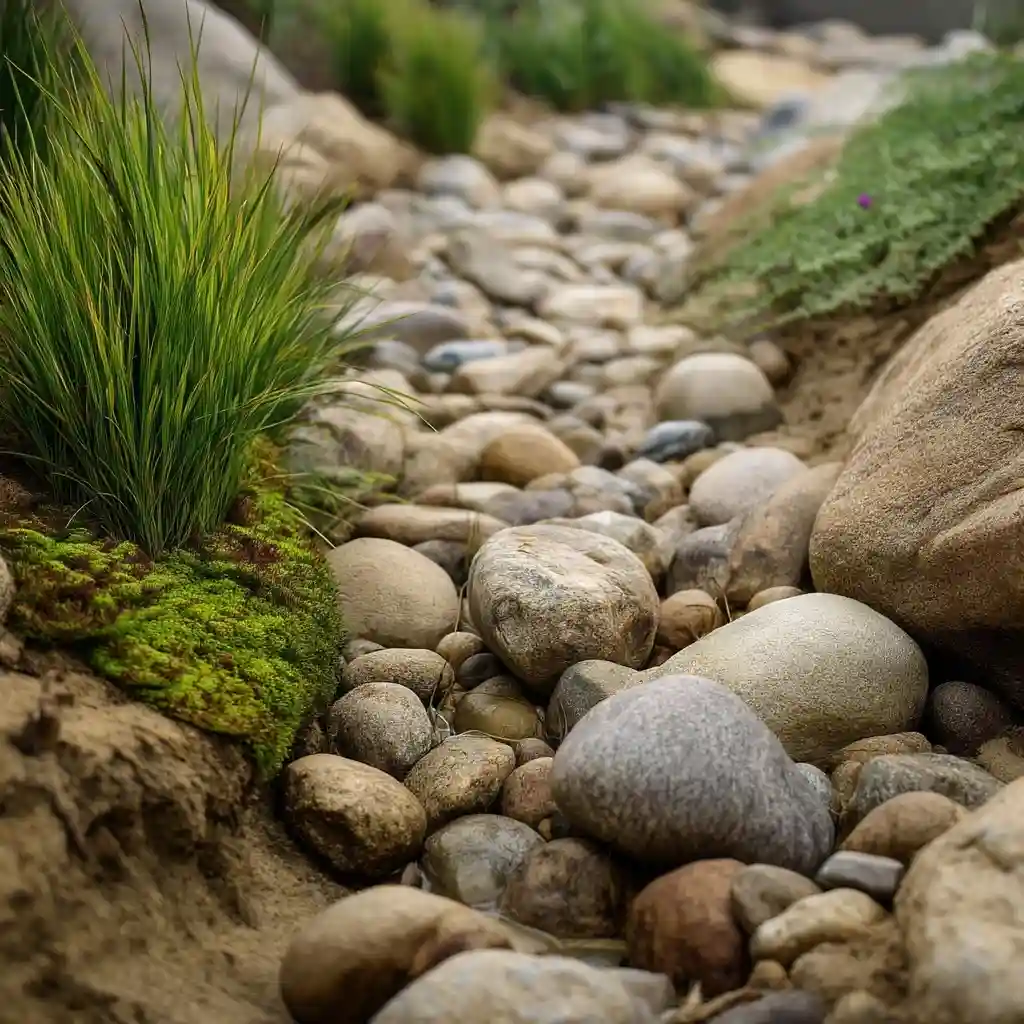
While smooth, rounded riverstones can elevate the natural look of your dry creek bed, they need to be chosen with care. Not all decorative riverstones are ideal for drainage. Some polished types can shift easily, leading to erosion or blocking water flow.
For the best results, select unpolished, irregular stones in a variety of sizes. These grip the soil better and create a more authentic stream-like appearance. A solid base layer of gravel beneath the stones will aid water absorption and keep everything in place.
To make your dry creek bed eco-friendly and low maintenance, edge it with native plants. These improve soil retention, attract pollinators, and reinforce the natural look you’re going for.
Pro Tips:
- Slope the bed slightly downhill for water redirection
- Use weed barrier fabric under your stones to prevent unwanted growth
- Anchor larger stones with landscape adhesive for extra stability during storms
Mix stone colors and textures for added depth and contrast—but always prioritize function over looks when water flow is at stake.
2. Curvy Creek Design
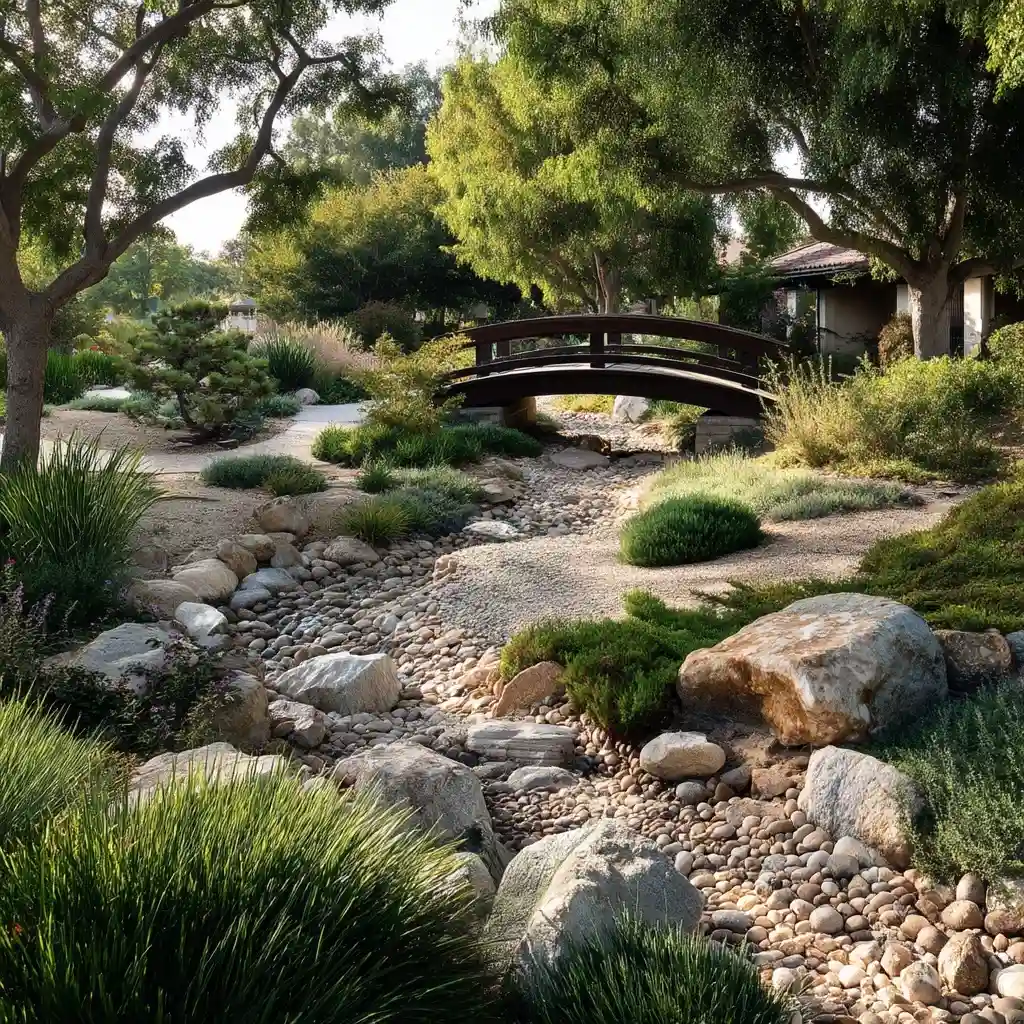
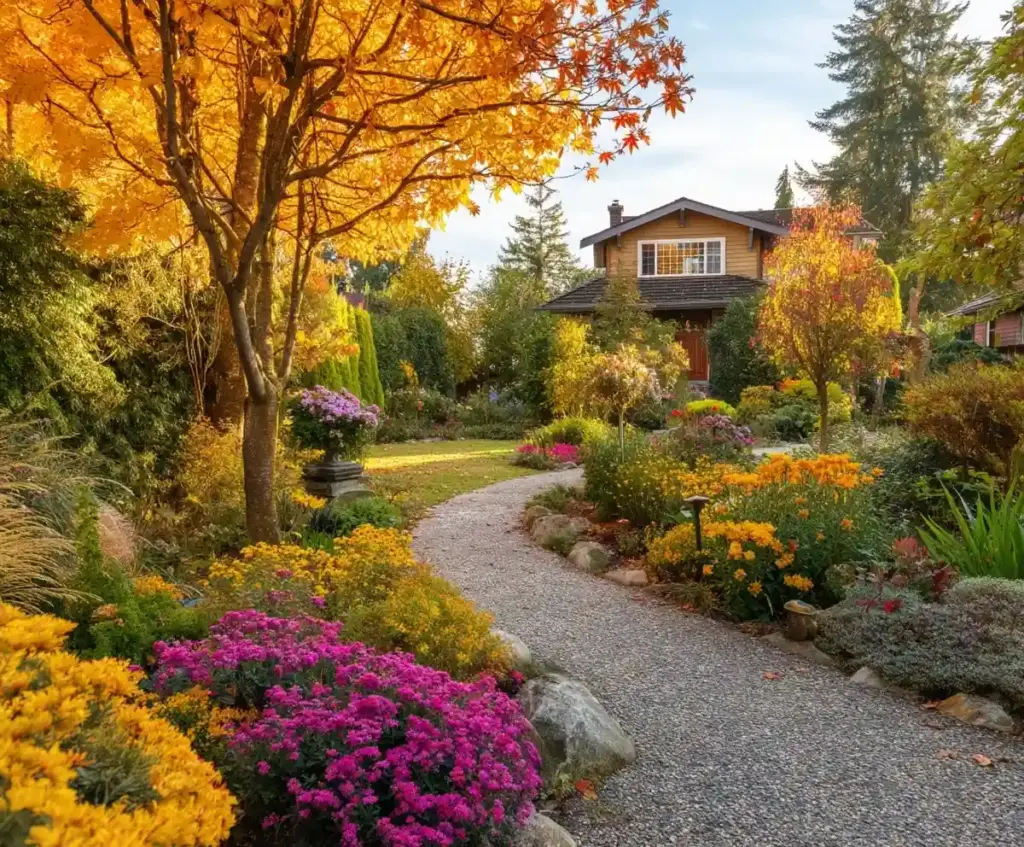
A dry creek bed doesn’t have to follow a straight line—in fact, curving the path can make your landscape feel more natural and expansive. Gentle, flowing curves create movement and visual rhythm, guiding the eye smoothly across your yard.
To plan your shape, lay out a garden hose or rope first. This helps you visualize the curve before digging. Once you’re happy with the design, dig along that line and start shaping the bed with varying depths and widths for a more organic look.
Position larger rocks at bends to hold smaller stones in place and slow runoff. For added charm, incorporate a small footbridge or stepping stones across the curves, turning your creek bed into a usable, interactive feature.
Planting Tip: Add grasses and perennials along the outside curves to soften edges and make the flow appear more natural. Bonus: many ornamental grasses also help with erosion control.
Curvy Design Checklist:
- Outline with a hose before digging
- Use varied stone sizes for a realistic flow
- Add plants to balance hard edges
- Consider a focal point like a bridge at a key curve
Curved dry creek beds give your landscape a soft, meandering beauty—while still handling drainage like a pro.
3. Rock and Plant Combo
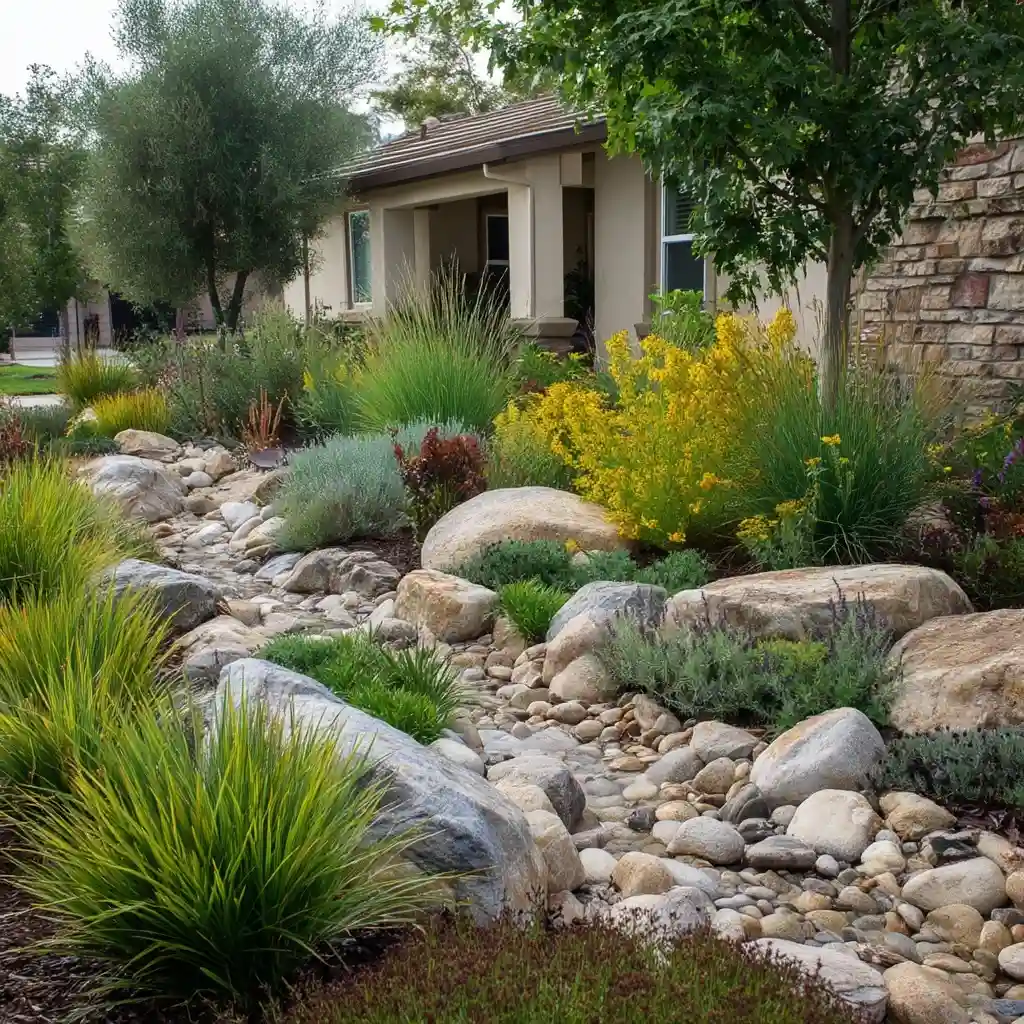
Blending rocks with drought-tolerant plants turns a basic dry creek bed into a vibrant landscape feature. The contrast between rough stone textures and lush greenery adds depth and dimension to your yard while maintaining efficient water flow.
Start with a sturdy foundation of gravel, then layer in river rocks and boulders of varied sizes. Between the stones, plant low-maintenance varieties such as sedum, blue fescue, yarrow, and native grasses. These thrive in dry conditions and help prevent erosion.
The key is placement: cluster plants in pockets between rocks, leaving clear channels for runoff. This not only boosts visual appeal but also ensures the creek bed still functions properly during rain.
Pro Planting Tips:
- Use soil amendments in planting pockets for better root development
- Include evergreens for year-round interest
- Space plants unevenly for a more natural look
- Avoid overplanting—let the rocks remain the star
Lighting also plays a role here. Tuck low-voltage LED lights near taller plants or along the stone line to create subtle, atmospheric highlights in the evening.
This hybrid approach blends hardscape and softscape elements beautifully—perfect for homeowners who want a dry creek bed that looks alive, even when the water’s not flowing.
4. Multi-Level Creek Bed
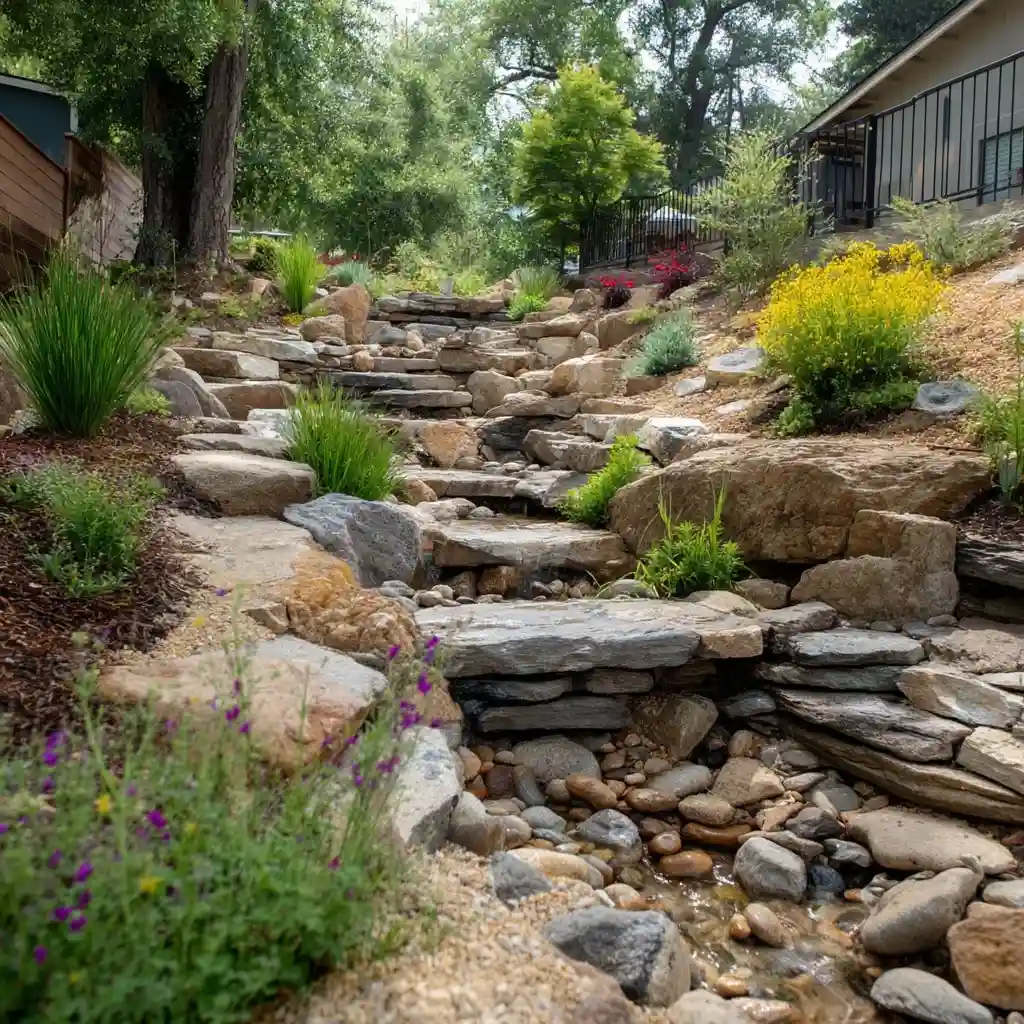
If your yard has natural slopes or elevation changes, a multi-level dry creek bed is a smart and stylish solution. This design breaks up the terrain into tiers, each acting like a mini reservoir to manage water flow more efficiently.
Start at the highest point and work your way down, using retaining rocks or small walls to define each level. Larger boulders should anchor the bottom tier, while mid-sized stones and gravel fill in upper sections. This setup slows down heavy runoff and prevents erosion across uneven ground.
Layer your plantings strategically:
- Use groundcovers and low-growing plants at the bottom
- Taller varieties like ornamental grasses or shrubs on the upper levels
- Add small waterfalls or spillways between levels for visual movement—even without actual water
Construction Tips:
- Use landscape fabric between levels to suppress weeds and stabilize the soil
- Ensure proper slope on each tier for controlled water descent
- Consider a small solar-powered fountain at the top to simulate trickling water
A tiered dry creek bed not only handles difficult terrain—it turns it into an architectural feature that adds dimension and interest to your garden layout.
5. Eco-Friendly Creek Bed
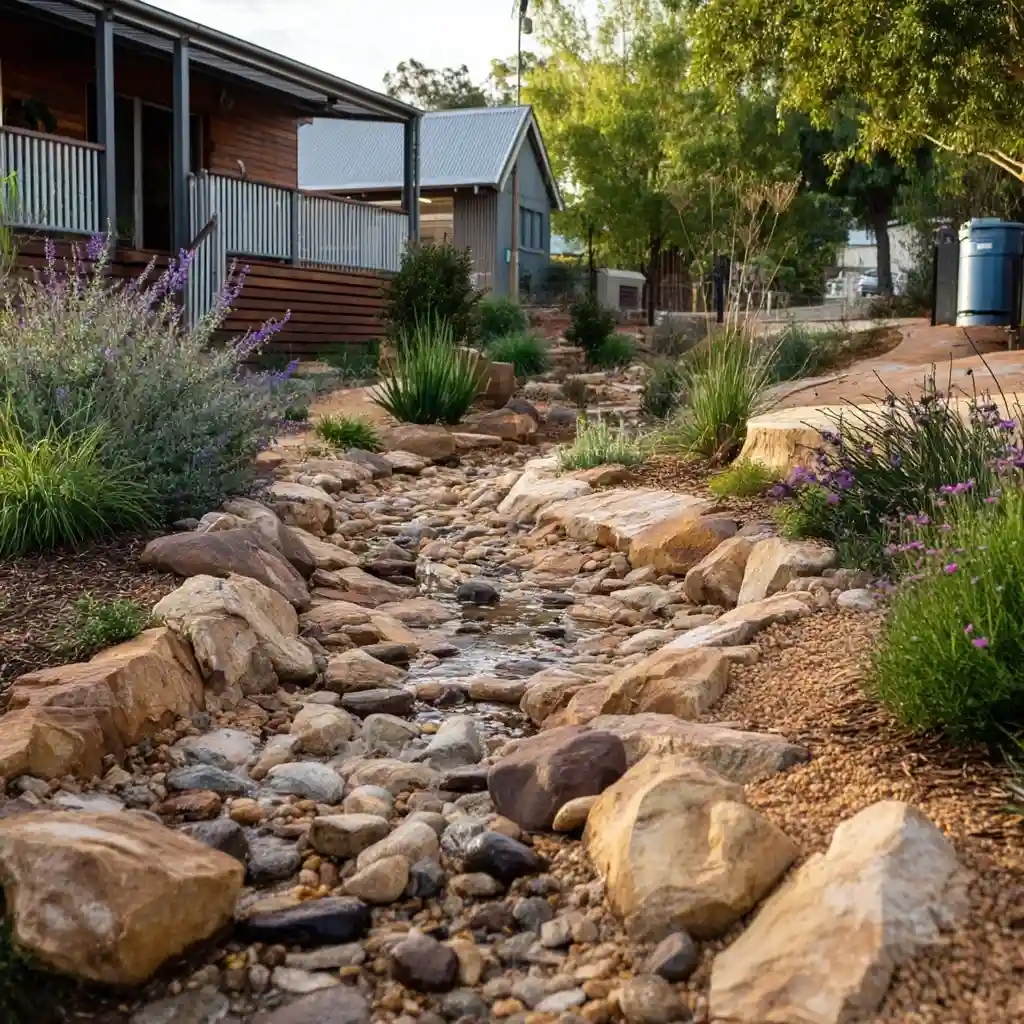
A sustainable dry creek bed doesn’t just solve drainage problems—it helps the planet too. By using recycled materials and native plants, you can build a beautiful landscape element that supports local ecosystems and reduces waste.
Instead of new stone, repurpose old bricks, broken concrete, or reclaimed flagstone to form your creek’s base. These materials have texture, durability, and unique charm—and they keep construction debris out of landfills.
Surround the stonework with native vegetation. Local plants are naturally adapted to your climate, meaning they require less water and maintenance. Plus, they offer food and shelter for pollinators and beneficial insects.
Sustainable Design Tips:
- Use mulch or shredded bark instead of synthetic edging
- Avoid chemical fertilizers—opt for organic compost or worm castings
- Capture runoff from your gutters and redirect it into the creek bed with a rain chain or downspout extension
- Install rain garden pockets along the sides to slow and absorb water naturally
This design does double duty—reducing runoff and attracting wildlife—while keeping your yard attractive and low-impact.
6. Decorative Edging
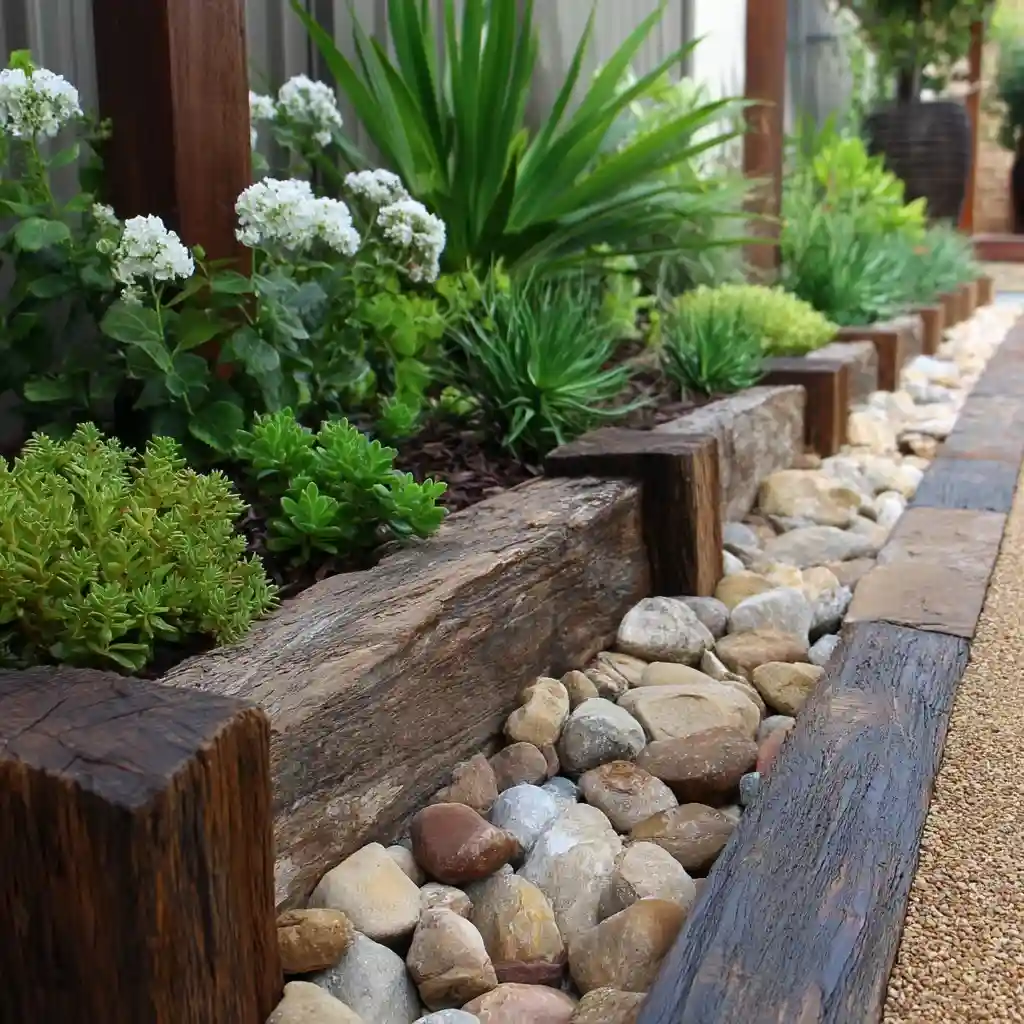
Framing your dry creek bed with the right edging adds polish and helps define its shape. It also keeps gravel and smaller stones from spilling into your lawn or garden beds—making both function and form stronger.
Choose from a variety of materials depending on your landscape style:
- Timber boards offer a warm, rustic feel
- Steel or aluminum edging creates a sleek, modern outline
- Natural stone borders blend seamlessly with the creek bed itself
- Cobblestone or brick adds classic charm to cottage-style gardens
To install, dig a shallow trench along each side of your creek bed. Set the edging material in place, ensuring it follows the natural curves of the layout, and secure it with stakes or landscape adhesive if needed.
Design Tips:
- Mix textures—try smooth gravel inside and rougher stones or bricks on the edge
- Keep edging slightly raised to help contain water and stones during storms
- Add low-growing plants or moss between edge pieces to soften lines
Well-chosen edging doesn’t just contain your design—it elevates it, giving your dry creek bed a clean finish that draws attention without stealing the spotlight.
7. Water Feature Integration
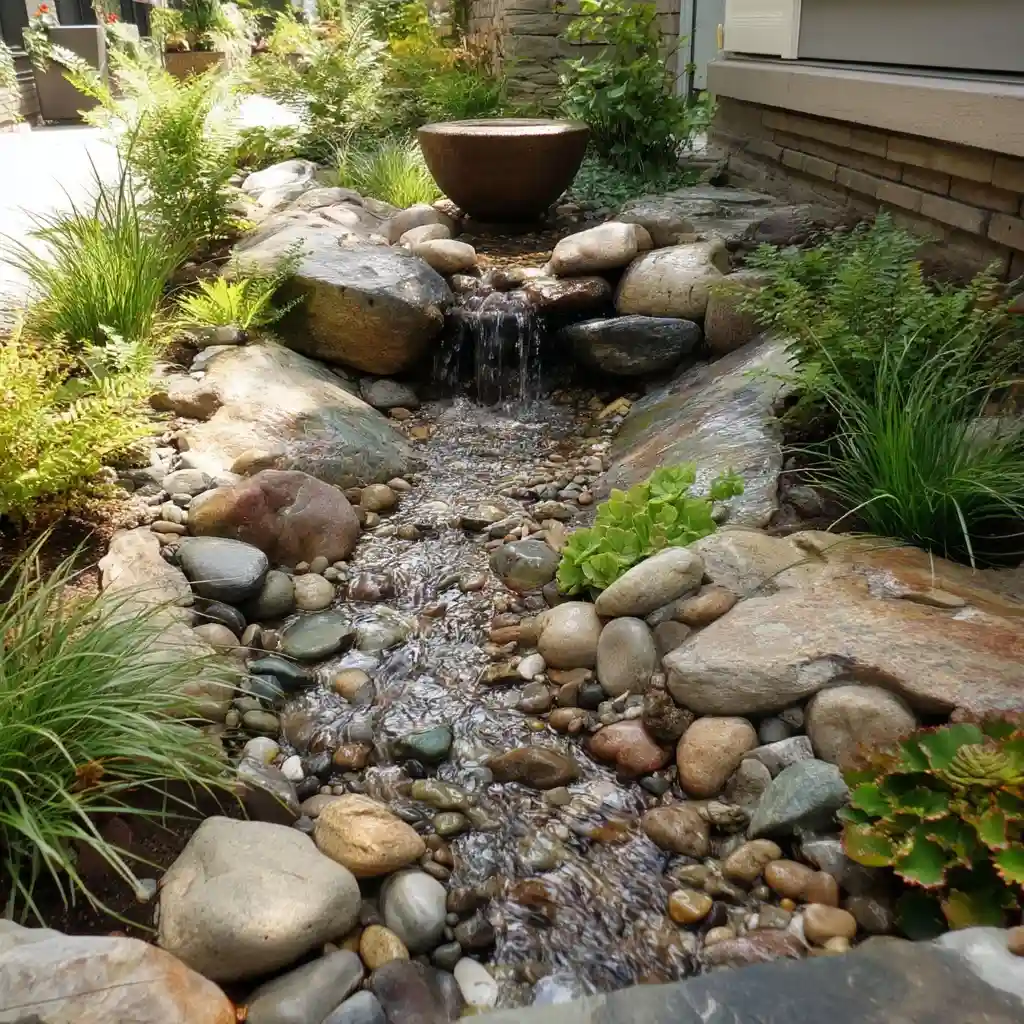
Even though a dry creek bed is designed for dry conditions, integrating a small water feature adds a dynamic element that blends function with beauty. The soft sound of flowing water can create a peaceful atmosphere while enhancing your yard’s drainage capacity during heavy rain.
Install a small recirculating fountain, pond, or bubbler at the head or midpoint of your creek. From there, water can trickle over rocks and through channels lined with gravel, mimicking a natural stream. Use hidden pumps and reservoir basins to keep the system low-maintenance and energy-efficient.
Be sure to use water-tolerant plants like rushes, sedges, or creeping jenny around the wetter areas. These thrive near water and create a lush, riparian look without overwhelming the dry creek bed aesthetic.
Installation Tips:
- Choose a solar-powered water pump to save energy
- Hide plumbing under flat stones or gravel
- Incorporate a pond liner beneath the feature to prevent erosion
- Edge the wet zone with larger stones to keep water contained
Adding even a subtle water feature turns your dry creek bed into a tranquil focal point—blurring the line between dry and wet landscaping.
8. Seasonal Color Changes
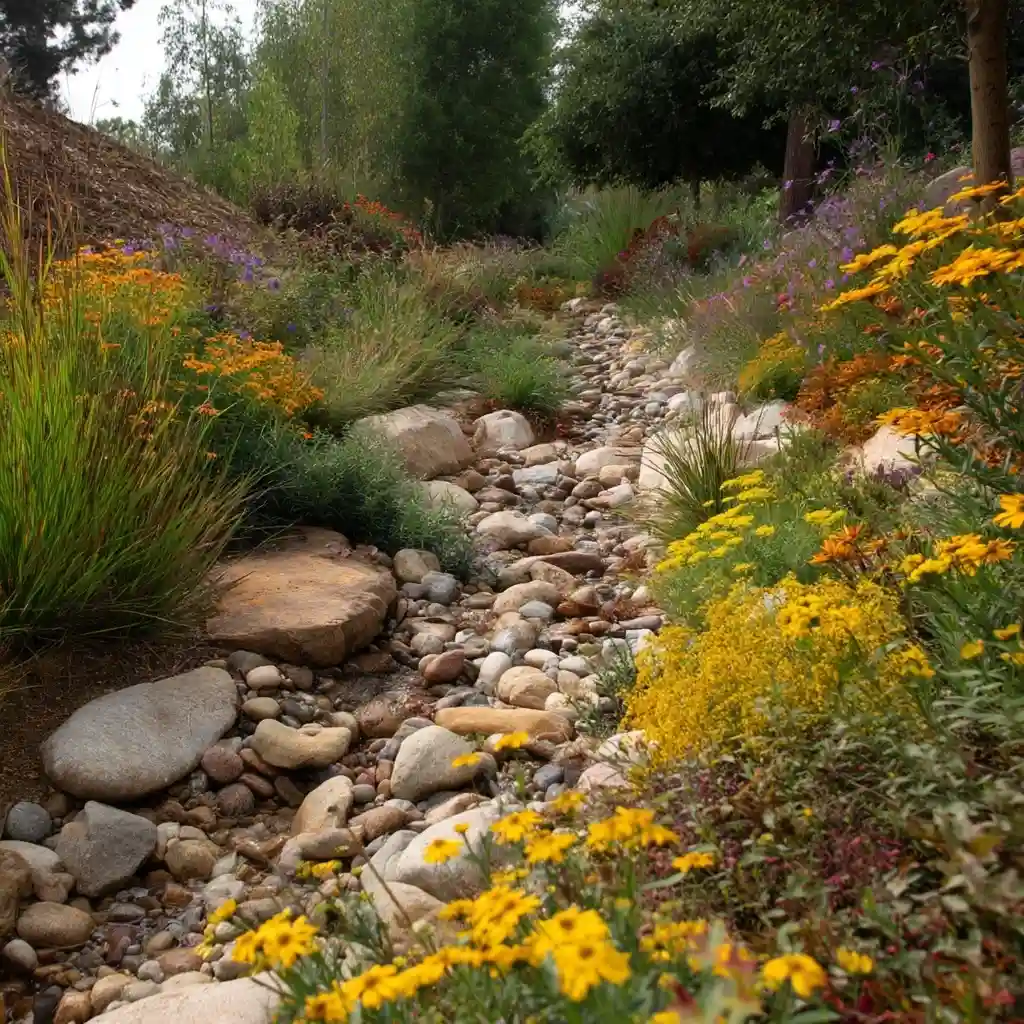
A well-planned dry creek bed can stay visually appealing year-round by incorporating plants that offer seasonal color and texture. Instead of looking dormant in winter or too uniform in summer, your landscape will shift beautifully with the seasons.
In early spring, plant bulbs like daffodils or crocuses near the edges for cheerful pops of color. As summer approaches, transition to perennials such as echinacea, black-eyed Susans, or salvia. These thrive in dry soil and complement rocky textures.
Come fall, ornamental grasses like switchgrass or little bluestem provide golden hues and movement. Even in winter, low-growing evergreens or red-twig dogwoods can keep your creek bed lively.
Design Tips for Year-Round Appeal:
- Use a mix of bloom times to stagger color throughout the year
- Plant in clusters instead of rows for a more natural look
- Choose drought-tolerant varieties to reduce upkeep
- Add seasonal décor like pumpkins in fall or lanterns in winter for added flair
Pairing stones with changing foliage ensures your dry creek bed evolves with the seasons—so there’s always something new to enjoy, no matter the month.
9. Minimalist Approach
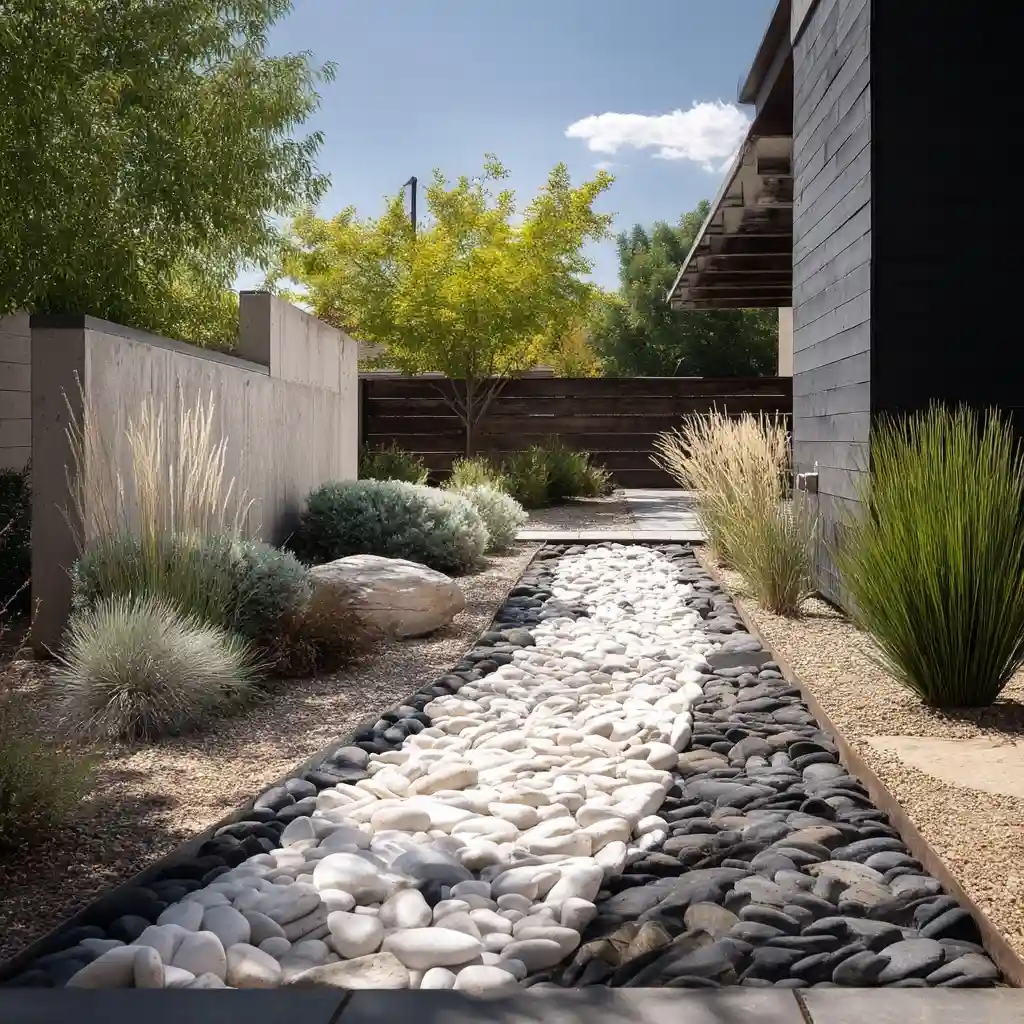
If you prefer clean lines and simplicity, a dry creek bed can fit seamlessly into a minimalist garden. The trick is to focus on balance, texture, and intentional space, rather than filling every corner.
Stick to neutral-toned stones—whites, grays, or soft tans—and lay them in smooth, uninterrupted flows. Use uniform gravel or river rock for a streamlined appearance, and avoid mixing too many sizes or colors.
Limit plant choices to just one or two species, such as low-growing succulents, blue fescue, or tidy clumps of mondo grass. These create gentle contrast without visual clutter.
Minimalist Tips:
- Keep shapes simple—avoid too many curves or sharp angles
- Choose a monochrome palette for both stones and foliage
- Eliminate ornamentation; let the textures do the talking
- Use lighting sparingly, with ground-level LED lights to enhance the design at night
This style works well for small urban gardens or modern landscapes where less really is more. A minimalist dry creek bed can feel serene, intentional, and calming—while still handling your drainage needs quietly and efficiently.
10. Artistic Accent Pieces
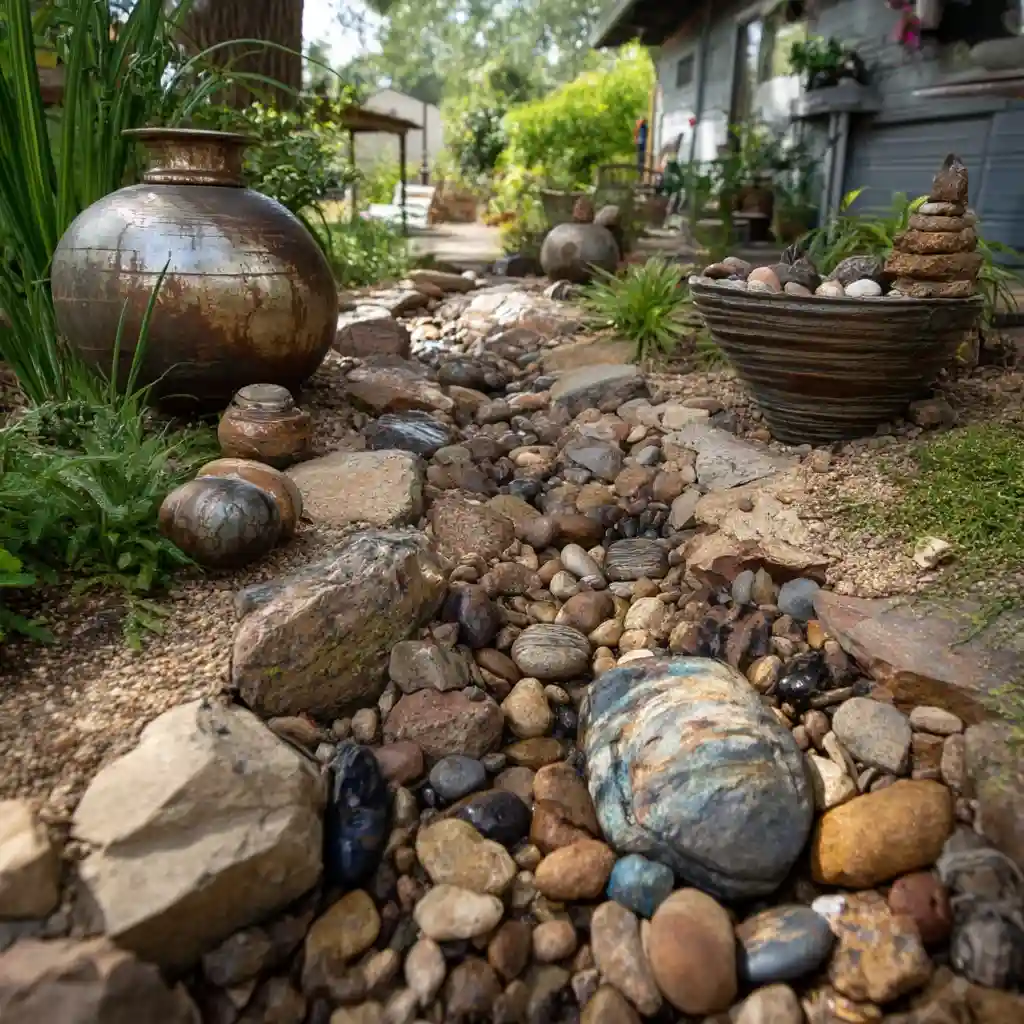
Add personality to your dry creek bed by incorporating artistic accents that reflect your style. These elements can elevate your landscape from functional to truly eye-catching.
Start small with garden sculptures, decorative pots, or metal art tucked among the stones. Choose pieces that harmonize with natural elements—think rusted iron, weathered wood, or stone carvings. These materials age gracefully and complement the earthy textures of your creek bed.
For a touch of whimsy, consider colored glass or ceramic orbs nestled in gravel pockets. Or hang wind chimes from nearby branches to add movement and soft sound.
Artistic Accent Ideas:
- Use a stacked rock cairn as a centerpiece
- Paint select stones with earth-tone patterns or leaf motifs
- Add a rustic birdhouse or driftwood sculpture near the head of the creek
- Incorporate mosaic stepping stones for a surprise pop of color
Just be sure any decor you add doesn’t obstruct water flow or make the bed look cluttered. Artistic additions should feel like natural extensions—not afterthoughts.
By weaving in meaningful details, your dry creek bed becomes more than a drainage feature—it becomes a reflection of your creativity.
11. Floating Stones Effect
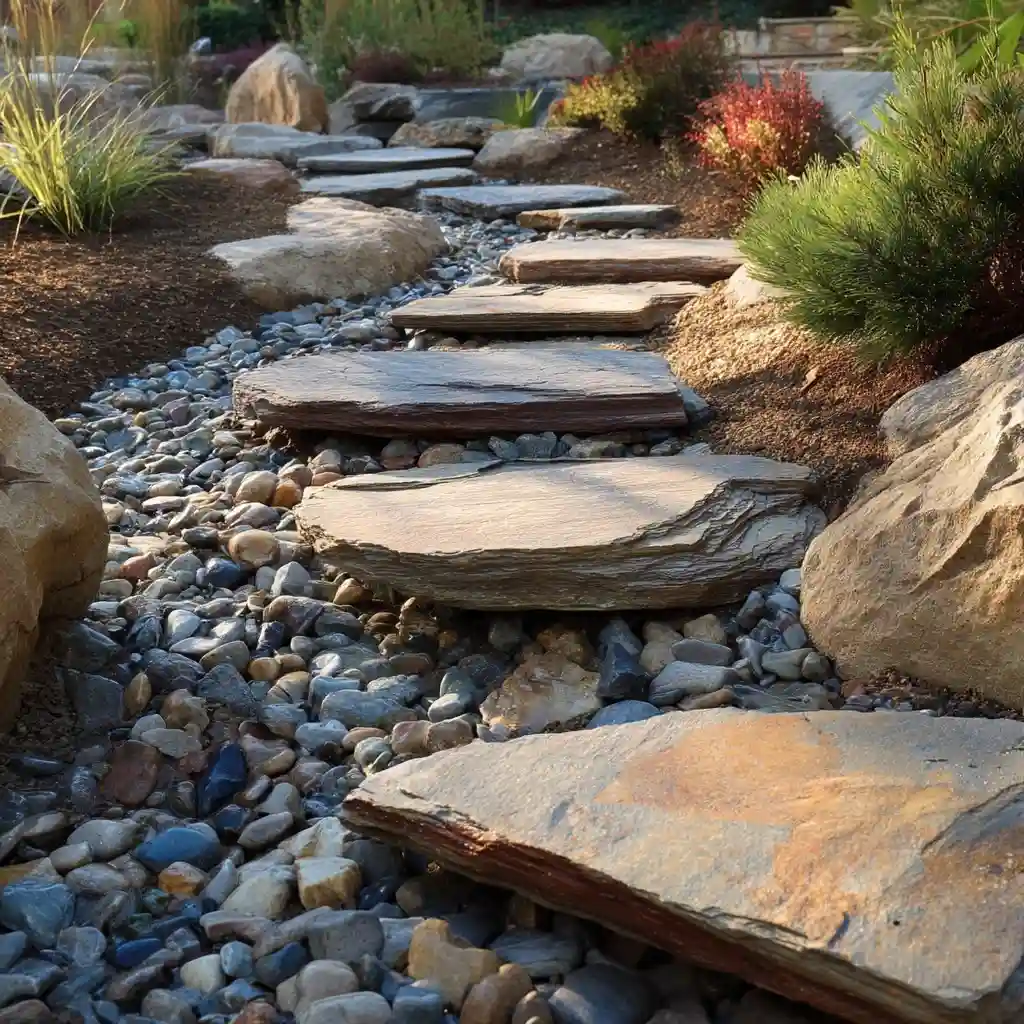
Create a visual illusion in your dry creek bed by designing a floating stones effect. This clever technique uses placement and contrast to make large stones appear as if they’re hovering above the ground.
The trick is to recess smaller gravel or pebbles around the base of larger flat rocks, so their edges are elevated and clean. This creates subtle shadow lines and separation from the base layer—mimicking a floating look, especially when viewed from the side.
Choose smooth, flat stones like slate or flagstone for best results. Place them at even intervals to form a path or highlight curves in the creek.
Floating Stone Tips:
- Use landscape fabric under the gravel to keep layers defined
- Level the area with a tamper tool before placing feature stones
- Leave consistent spacing between each “floating” stone
- Illuminate the effect at night with low-angle lighting
This design technique adds a modern twist to a traditional dry creek bed, making it feel lighter and more sculptural. It’s especially impactful in minimalist or Japanese-inspired landscapes.
12. DIY Lighting Solutions
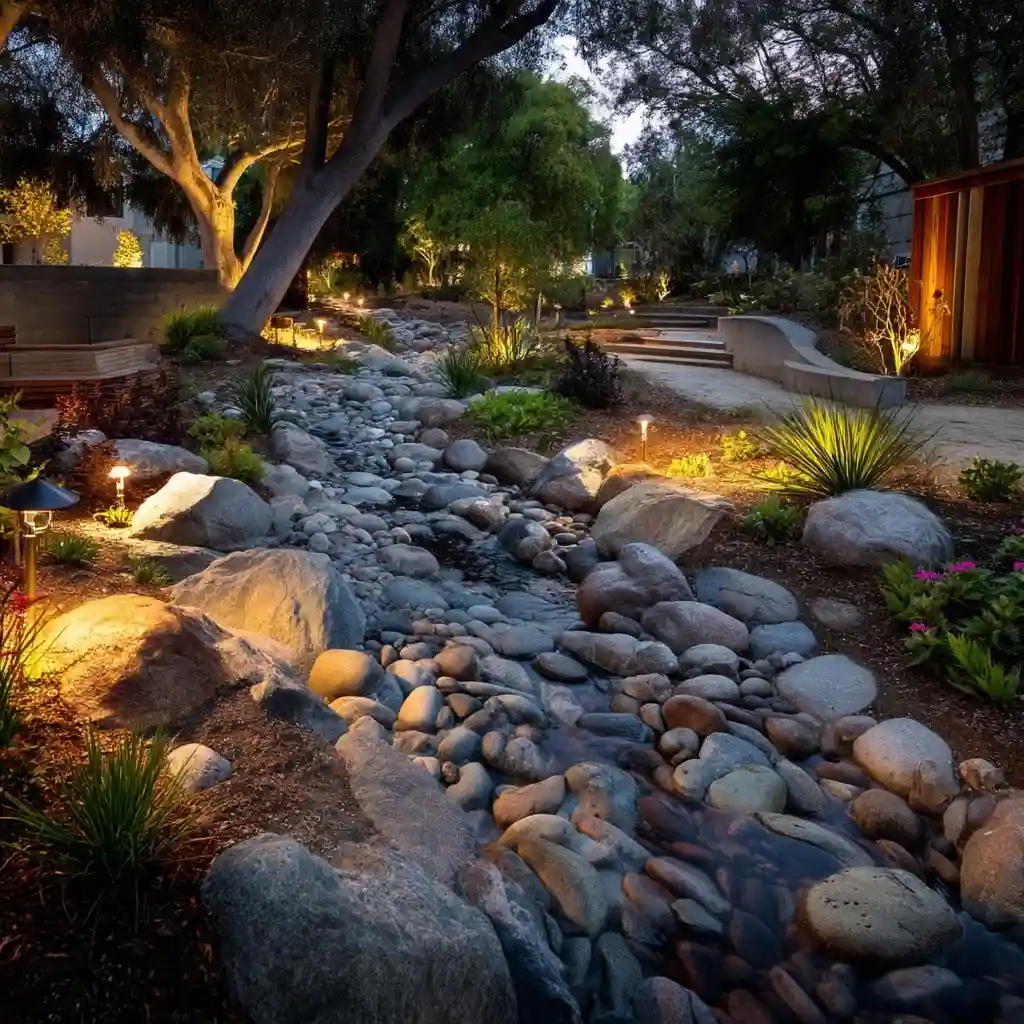
Thoughtful lighting can turn your dry creek bed into a magical focal point after dark. Beyond boosting curb appeal, it also improves safety and highlights the textures and curves of your design.
Start with low-voltage LED path lights or solar-powered stake lights placed subtly along the edges. Position them to cast soft shadows across stones and plants, enhancing depth and contrast.
For a dramatic look, install uplighting behind large boulders or under focal plants. If your creek bed curves, use lights to guide the eye along its path, almost like a glowing stream at night.
DIY Lighting Tips:
- Hide cables beneath gravel or use wireless solar options
- Choose warm white lights (2700K–3000K) for a natural glow
- Use timers or dusk sensors for automatic operation
- Add lanterns or string lights on nearby trees or fences for ambiance
Lighting transforms your dry creek bed into a 24/7 feature—offering beauty, function, and mood, whether it’s sunny or starlit.
13. Focal Stones Arrangement
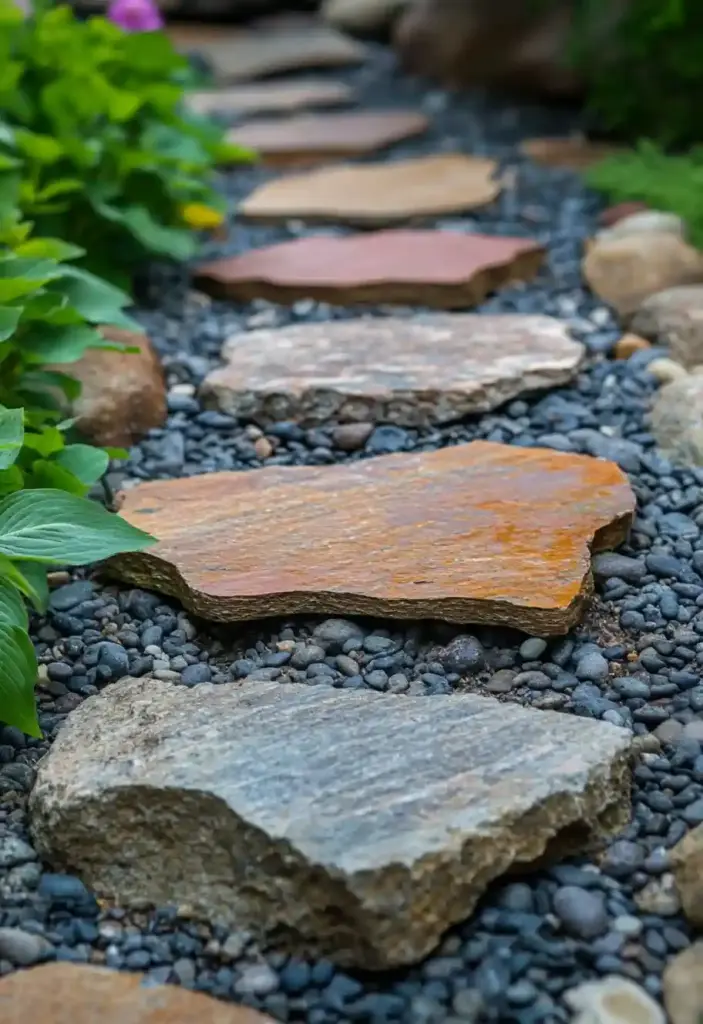
Make your dry creek bed truly stand out by designing a focal point with carefully arranged large stones. These eye-catching features draw attention and help anchor your landscape design visually.
Choose a few oversized, colorful, or unusually shaped rocks and position them at natural bends in the creek or where the bed begins or ends. Cluster them in odd numbers—typically groups of three or five—for a more organic and balanced look.
Surround your focal stones with smaller accent rocks and native grasses or groundcovers to soften the transition. The contrast in scale creates a layered, natural appearance that mimics riverbanks in the wild.
Pro Arrangement Tips:
- Bury at least one-third of each large stone for stability and realism
- Face flat sides toward key viewing angles (like patios or walkways)
- Use differently colored gravel around focal stones for contrast
- Avoid symmetry—natural doesn’t mean perfect
A well-placed stone arrangement gives your dry creek bed a sculptural centerpiece—one that changes in mood and shadow throughout the day.
14. Edible Garden Integration
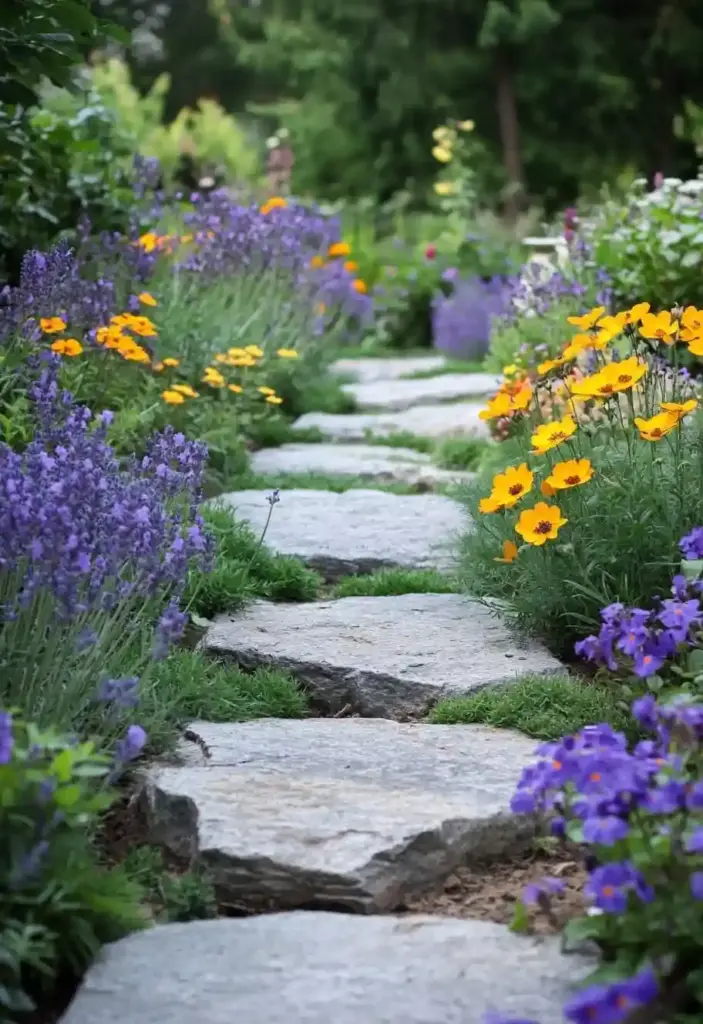
Blending beauty with practicality, you can turn your dry creek bed into a subtle edible garden. This design works especially well if your creek passes near a kitchen, patio, or walking path—making your herbs and veggies easy to access.
Nestle low-growing edibles like thyme, oregano, or creeping rosemary between the rocks. These herbs love well-drained soil and spread beautifully across gravel. On the banks, plant compact vegetables like chard, kale, or bush beans in defined pockets of enriched soil.
Want to take it further? Add edible flowers like nasturtiums or calendula for bright pops of color and culinary use. Raised edges or stone planters can help separate edibles from non-edible plants and maintain visual structure.
Edible Design Tips:
- Amend soil with organic compost in planting pockets
- Use stepping stones to allow easy harvesting without compacting soil
- Add mulch around veggies to retain moisture
- Keep edibles near full sun areas for best yield
An edible dry creek bed is perfect for small-space gardeners who want their landscape to work double duty—tasty and beautiful.
15. Seasonal Boulders Display
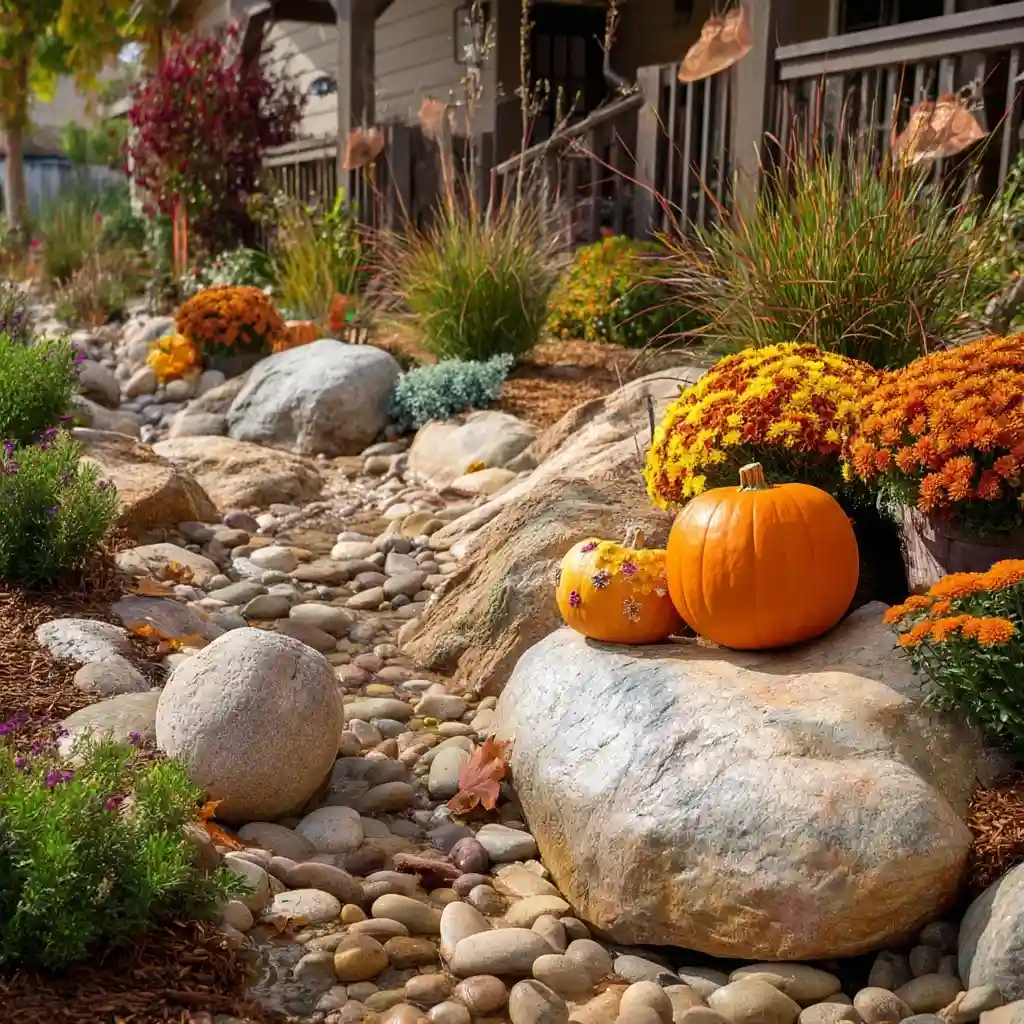
Large boulders don’t just serve a functional role in a dry creek bed—they can also become seasonal showpieces that evolve throughout the year. By styling them with changing decorations or plants, your creek bed becomes a dynamic part of your landscape.
In spring and summer, surround boulders with colorful annuals or climbing vines like nasturtiums. Come fall, add mini pumpkins, gourds, or ornamental cabbage nearby. In winter, a dusting of snow or a simple solar lantern can create a serene focal point.
You can even paint or etch seasonal motifs directly onto smooth stone surfaces using weather-resistant paint, then seal them for protection.
Display Tips:
- Position your main boulders where they’ll catch sunlight and attention
- Use gravel or mulch around the base to prevent weed growth
- Secure large stones with crushed rock or landscape adhesive to avoid shifting
- Consider a rotating themed decor: patriotic in summer, harvest in fall, holiday in winter
A seasonal approach brings life to your dry creek bed year-round—keeping it relevant, festive, and fresh with very little effort.
16. Travel-Theme Elements
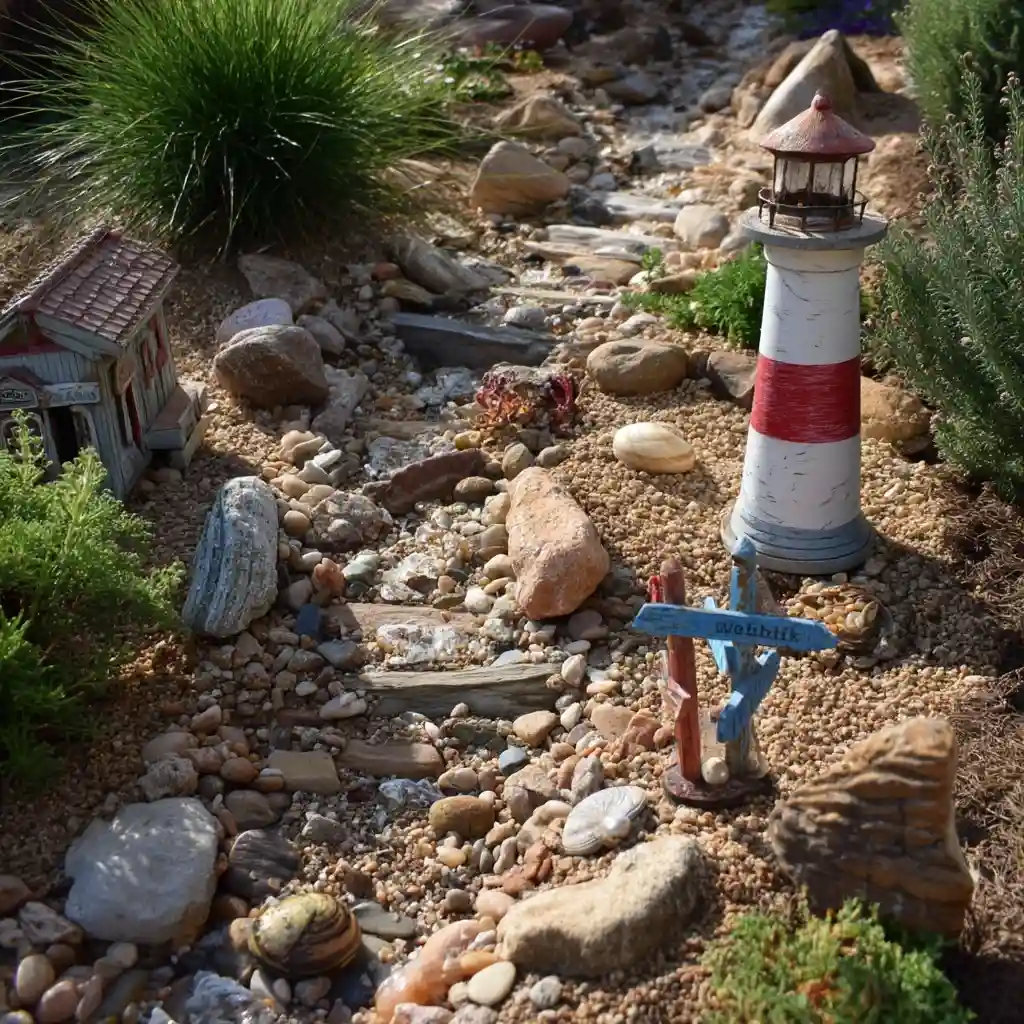
Bring a personal touch to your dry creek bed by incorporating travel-inspired accents that reflect your favorite destinations or memories. These whimsical elements add storytelling and charm to your landscape without compromising functionality.
Place beach pebbles, driftwood, or volcanic rocks gathered from trips (or store-bought equivalents) along the creek’s edge. Add miniature landmarks—like a small lighthouse, a Zen pagoda, or even a desert skull—to represent places you love.
Use engraved stones or metal signs with travel quotes or coordinates of memorable trips. If your creek bed has a bridge, decorate it with small international flags or symbols for extra flair.
Design Tips:
- Stick to a cohesive theme (coastal, mountain, tropical, etc.)
- Position decorative items outside the water flow zone
- Use landscape adhesive to secure lightweight travel pieces
- Pair the look with region-specific plants (e.g., succulents for desert themes, ferns for rainforest vibes)
This idea transforms your dry creek bed into a personal passport—one that lets your yard tell stories of where you’ve been, or where you dream to go.
17. Incorporating Paths and Trails
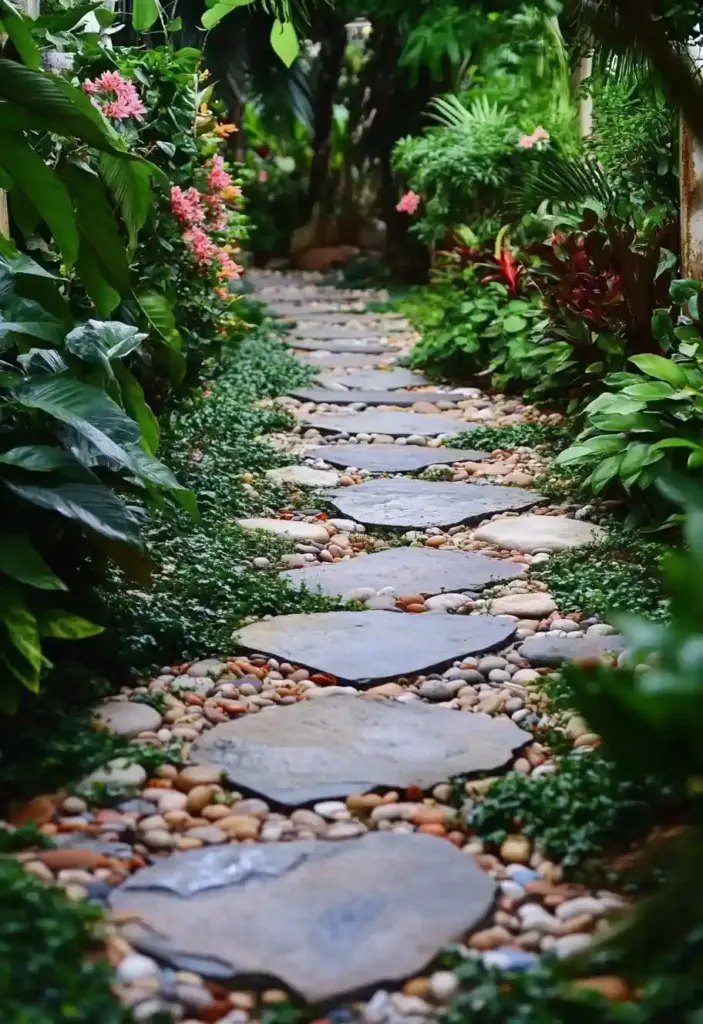
Adding walkable paths through or alongside your dry creek bed makes it interactive and practical—not just decorative. Trails encourage exploration, connect different parts of your yard, and help maintain access for gardening or maintenance.
Use large flat stones, pavers, or stepping stones spaced naturally along the creek. They can cross the bed in a “bridge” style or run parallel to it, depending on your layout.
Choose materials that match your stone palette for cohesion, and set each piece level with the ground for a stable, safe walking surface. Between the steps, plant low-growing groundcovers like creeping thyme or moss for added softness and color.
Trail Design Tips:
- Curve the path gently to mirror the creek’s flow
- Maintain a minimum 18″ width for easy walking
- Edge with small rocks or plants to guide the route visually
- Install solar path lights for nighttime usability
A well-designed path transforms your dry creek bed into more than a pretty feature—it becomes a journey through your garden.
18. Rock Art Creations
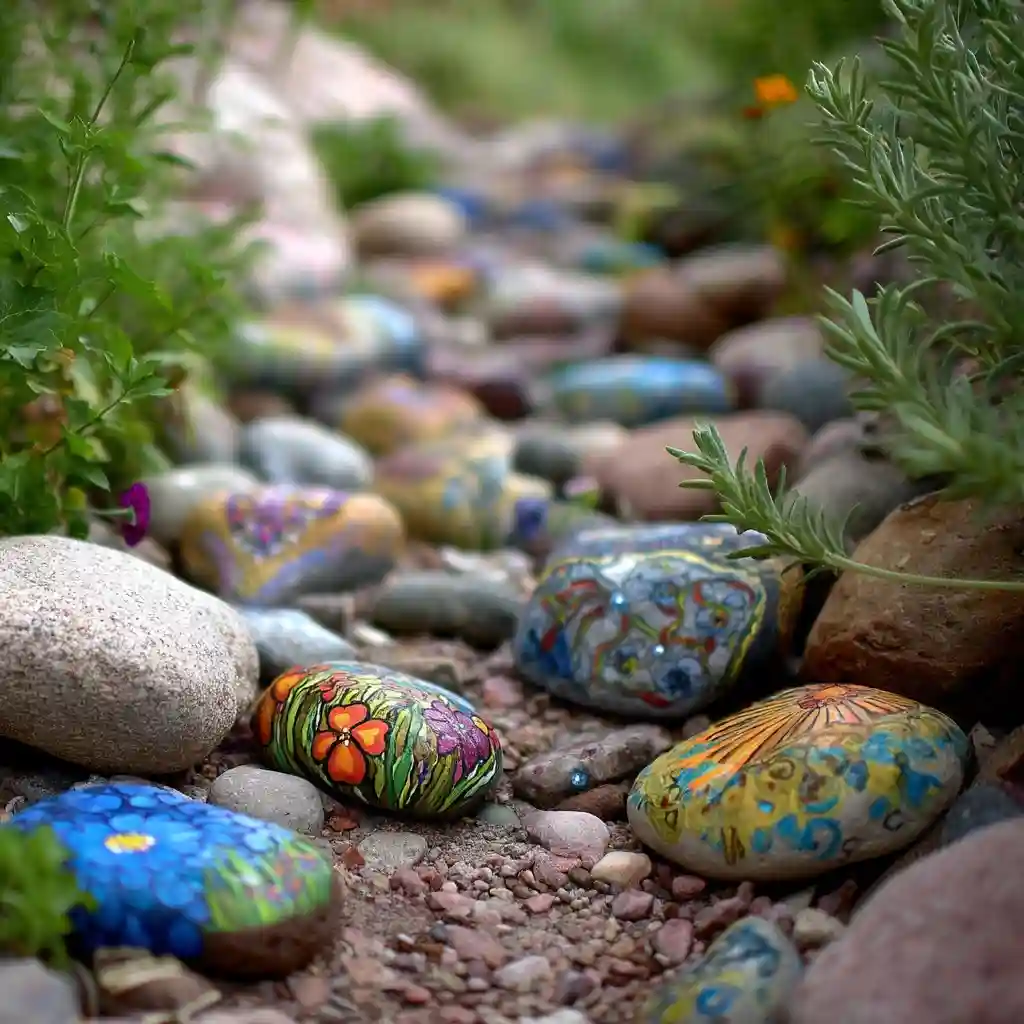
Add a playful and personal twist to your dry creek bed with custom rock art. Painted stones, stacked cairns, or engraved messages can inject creativity into the landscape while maintaining its natural feel.
Use smooth river rocks as your canvas for weather-resistant paint or etched designs. Try painting botanical motifs, wildlife symbols, or meaningful quotes. Arrange these stones in groupings near focal points or hide a few for guests (or kids) to discover.
For a natural sculpture, stack stones in balanced formations to create Zen cairns or abstract art. These work especially well in minimal or meditative garden spaces.
Creative Rock Art Tips:
- Seal painted rocks with UV-protective clear coat to prevent fading
- Place art slightly off the main path to avoid disrupting water flow
- Use a consistent color palette or theme for visual harmony
- Add a rock painting station nearby for a fun family or guest activity
These artistic touches turn your dry creek bed into a conversation starter—and a reflection of your style and spirit.
19. Incorporate Wildlife Habitat
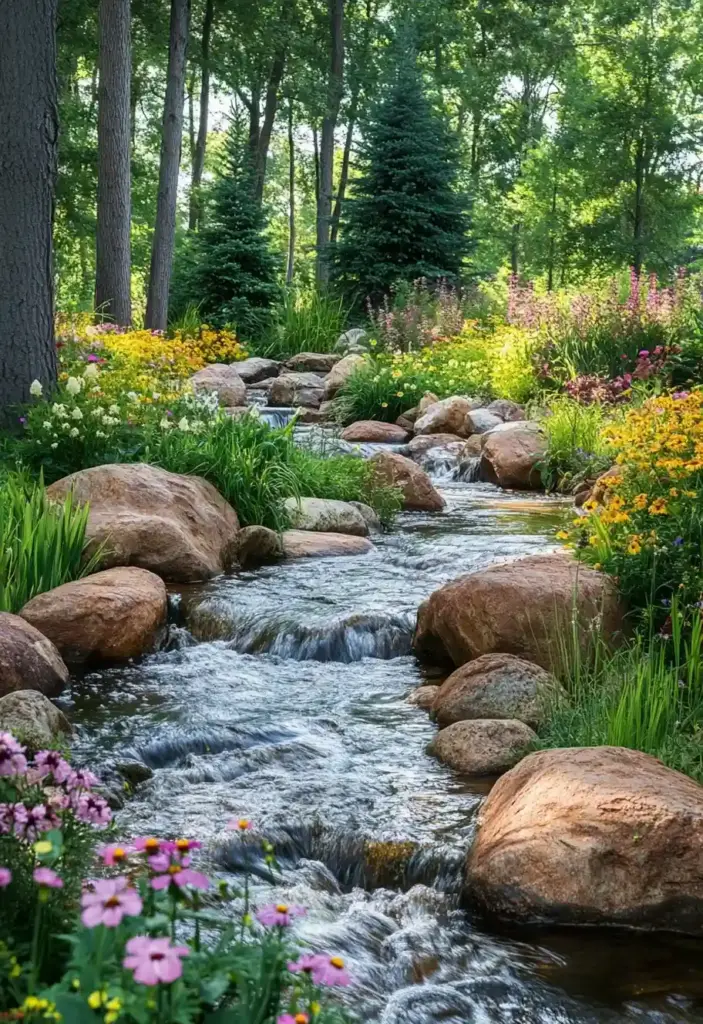
A thoughtfully designed dry creek bed can do more than manage water—it can serve as a thriving microhabitat for birds, pollinators, and beneficial insects.
Line the creek’s edges with native plants, which provide nectar, seeds, and shelter for local species. Mix in boulder nooks or small piles of stacked stones to offer hiding spots for frogs, lizards, or ground-nesting bees.
Add a shallow birdbath or small water basin at the start or end of the creek (especially if you’ve integrated a water feature). Even temporary puddles in a well-placed rock hollow can attract wildlife during rainy spells.
Wildlife-Friendly Tips:
- Use landscape fabric beneath gravel to retain warmth and moisture for burrowing critters
- Avoid chemical pesticides or fertilizers
- Add a pollinator sign or birdhouse to welcome guests
- Plant milkweed, bee balm, or goldenrod to support butterflies and bees
By offering food, water, and shelter, your dry creek bed becomes part of a larger, living ecosystem—one that gives back to nature while enhancing your yard’s charm.
Conclusion
A well-crafted dry creek bed is more than just a drainage fix—it’s a landscape feature that adds beauty, structure, and ecological value to your yard. Whether you’re drawn to clean minimalist lines, naturalistic stone and plant combinations, or whimsical decorative touches, these 19 DIY ideas offer inspiration for every style and skill level.
With a little planning, the right materials, and creative flair, your dry creek bed can become a year-round focal point that reflects your personality while serving a practical purpose.
So grab your gloves, sketch out a layout, and let your yard benefit from a design that blends function with unforgettable form.
🌿 Love gardening inspiration? Follow me on Pinterest for bold plant ideas, tips, and seasonal color!
More Posts
