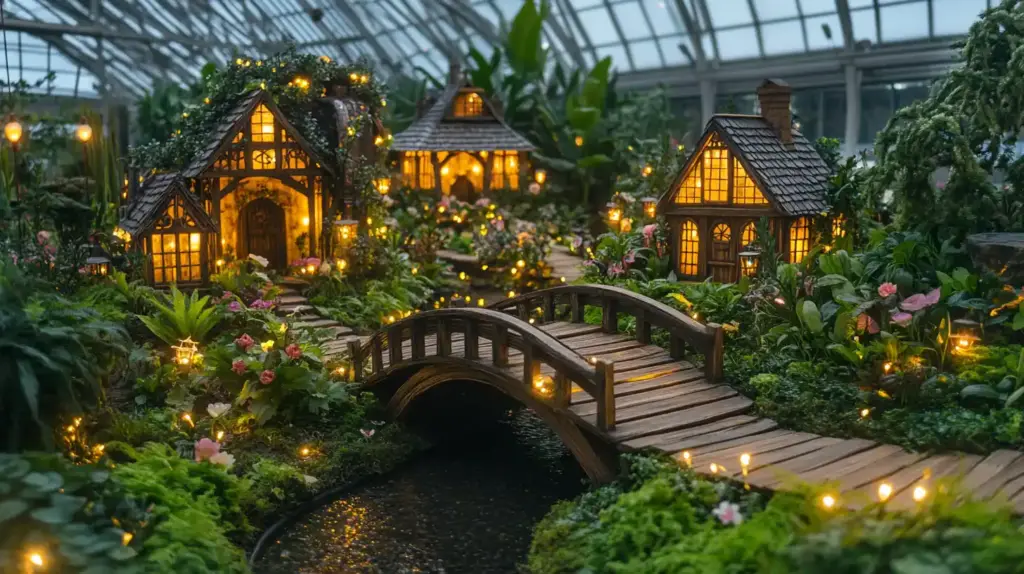
There’s something truly magical about transforming a quiet garden nook into a storybook space where imagination blossoms. With just a few natural elements and a spark of creativity, a simple backyard play area for kids can evolve into a wonder-filled sanctuary brimming with miniature bridges, glowing trails, and enchanting fairy hideouts. These whimsical fairy garden ideas are more than just decoration — they’re an invitation to dream, explore, and create lasting memories right at home.
Whether you’re a nature-loving parent, an inspired DIYer, or someone simply drawn to charming garden projects, this collection of whimsical garden ideas is packed with hands-on inspiration. We’ll show you how to use repurposed materials (like these upcycled garden projects) and simple landscaping techniques to craft fairy-themed worlds that both kids and adults will adore.
In this guide, we’ll explore 10 imaginative setups — each crafted to ignite storytelling, nurture creative play, and transform your yard into a magical escape. If you’re also dreaming of a vibrant space, consider integrating ideas from our flower garden designs or cheap backyard renovation tips to make your fairy garden both beautiful and budget-friendly.
Table of Contents
🌿 1. Mini Fairy Garden With a Working Drawbridge
Transform a shallow planter into a magical gateway with a working drawbridge — the ultimate showstopper in any whimsical fairy garden. This clever, interactive feature not only adds movement and storytelling potential but also becomes the centerpiece of a dynamic backyard play area for kids.
Why It Works
Children love tactile features. A miniature drawbridge they can lift and lower sparks endless stories — from fairy trading ports to secret woodland forts. It invites kids to play, not just observe.
What You’ll Need
- Popsicle sticks or rustic twigs (for bridge base)
- Two mini wood blocks or spools (as vertical supports)
- Twine or small chain for the lifting mechanism
- Toothpicks or bamboo skewers (for structure or axles)
- Hot glue or wood glue
- A wide shallow planter or container
- Moss, decorative stones, mini signs, and fairy figurines
How to Build It
- Craft the bridge base from popsicle sticks; glue and let dry completely.
- Attach support posts (your castle towers) to either side of the planter.
- Install the drawbridge mechanism by threading twine through holes in the bridge, looping it over the posts, and tying it to a button or bead.
- Decorate the scene with mossy banks, a “moat” made of blue glass pebbles, and miniature fairies or gnomes.
💡 Pro Tip: Add a tiny nameplate to the bridge — “Moonlight Crossing” or “Fairy Harbor Gate.” Personal touches spark curiosity and storytelling!
This whimsical addition blends engineering and imagination, creating an irresistible focal point that encourages hands-on play and fairy tale adventures in your own backyard.
🌿 2. Fairy Garden Treehouse in a Clay Pot
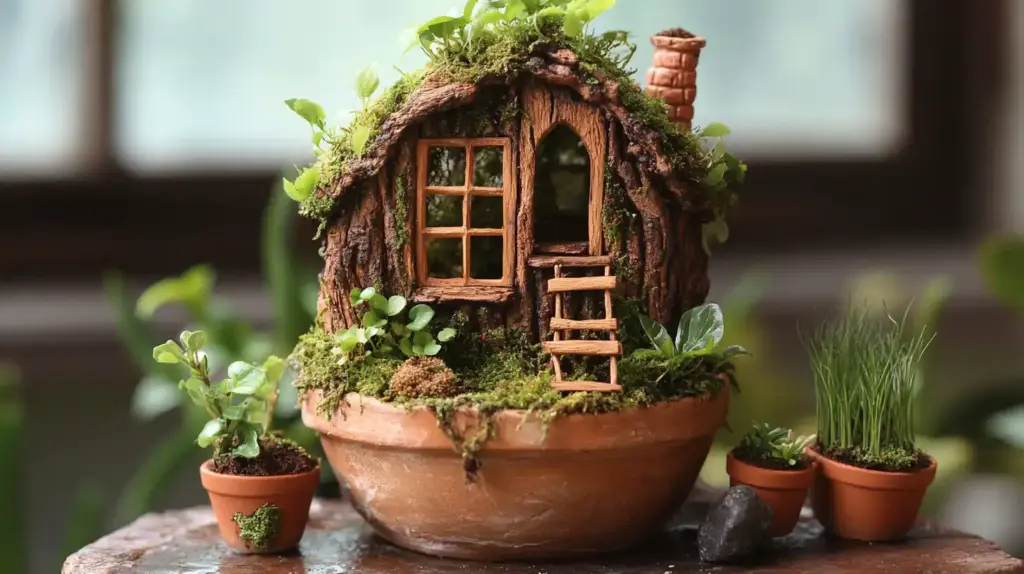
Bring the charm of a woodland retreat to your backyard with a miniature fairy treehouse, perfectly nestled inside a humble clay pot. This setup is ideal for compact spaces and adds a storybook vibe to any whimsical fairy garden idea, while doubling as an adorable element in a backyard play area for kids.
Why a Clay Pot?
Clay pots are budget-friendly and widely available — and their rounded shape makes the perfect canvas for a tiered treehouse scene. Whether perched on a porch, nestled among garden beds, or placed on a windowsill, this little creation turns heads and sparks big imagination.
Materials You’ll Need:
- A clay pot (8–12 inches)
- A sturdy twig or mini branch (for the tree trunk)
- Popsicle sticks or skewers (for platforms and ladders)
- Jute twine (ladder rope)
- Miniature doors, windows, flags, and stools
- Moss (real or faux)
- Tiny battery-powered string lights (optional)
- Hot glue gun or wood glue
How to Build It:
- Plant the “tree” in the center — secure the twig with soil or glue.
- Build a platform halfway up the twig using glued-together popsicle sticks.
- Attach a ladder made from twine and toothpicks — this adds realism and playfulness.
- Decorate your fairy home with moss on the ground, windows on the pot’s side, and even flags or flowerpots for flair.
- Light it up with mini string lights — the warm glow brings your fairy house to life at dusk.
🧚♀️ Whimsy Tip: Imperfection is part of the charm. Let the moss sprawl a little, leave gaps in the fencing, and allow the twig to lean slightly — just like a real treehouse built with love and imagination.
This fairy garden idea proves you don’t need a big yard to build magic — just a pot, a branch, and a vision.
🌿 3. Giant Fairy Garden From Landscaping Rocks
Turn leftover stones or landscaping rocks into a large-scale fairy kingdom! This whimsical fairy garden idea is perfect if you have extra yard space and want to create an immersive backyard play area for kids where storytelling meets natural textures.
Why Use Rocks?
Landscaping rocks are free (or cheap), durable, and full of character. Their weathered surfaces and unique shapes resemble ancient towers, enchanted hills, or secret dens — ideal for building a layered, fantasy-inspired terrain.
What You’ll Need:
- Large and medium-sized landscaping rocks
- Flat stones (to create paths, bridges, or “rooftops”)
- Soil and gravel (to shape elevations)
- Moss (live or dried)
- Miniature doors, gnome figurines, toadstools, and signs
- Dwarf groundcovers (like thyme or sedum)
- Optional: pre-made fairy decor kits for convenience
How to Build It:
- Choose a visible corner of your yard, ideally along a path or near other garden beds.
- Lay a stone foundation — flat stones for streets or plazas, then larger stones as buildings or “hills.”
- Shape the land with soil and gravel — create varied heights for a layered look.
- Tuck moss and plants between rocks — let them spill naturally to mimic a lived-in, wild fairy village.
- Add decorative elements: fairy doors at the base of rocks, gnome trails, little signs like “Pixie Crossing” or “Herb Market.”
🪨 Creative Twist: Stack rocks into a spiral tower and add a small flag or beacon — it becomes a fairy lighthouse or ancient lookout post.
This garden evolves over time — as moss grows and plants fill in, the space becomes more magical. Plus, the tactile nature of the rocks invites kids to explore, arrange, and dream in a world that feels real beneath their fingertips.
🌿 4. Easy Pot, Moss & Pebbles Fairy World
Short on time or space? This whimsical fairy garden idea proves that simplicity can still spark serious magic. With just a few natural materials and a small flower pot, you can create a charming fairy world that’s perfect for windowsills, porches, or entryways — and a delightful addition to any backyard play area for kids.
Why This Works
This minimalist design focuses on texture and storytelling. It’s budget-friendly, fast to assemble, and easy to customize. Whether you build it solo or as a weekend project with the kids, this is a quick win that brings a smile every time you walk by.
What You’ll Need:
- A small to medium flower pot (any shape or style)
- Potting soil or sand
- Clumps of moss (real or decorative)
- River stones, aquarium gravel, or driveway pebbles
- Tiny props: a door, bench, snail figurine, mini sign
- Optional: a fairy garden starter kit to skip the sourcing
How to Build It:
- Fill the pot loosely with soil or sand — keep it light and slightly mounded for a “living” look.
- Place moss clumps asymmetrically — variation gives the scene a more organic feel.
- Lay a stone path or a circular pebble maze — don’t worry about symmetry; this is a fairy realm!
- Add decorative touches: a twig bench, a mini sign that says “Fairies Sleeping,” or a tea cup for whimsical flair.
🌟 Small Touch, Big Impact: One standout detail — like a red mushroom cap or a blue acorn dish — makes the whole world feel alive and intentional.
You can build this in under 15 minutes, yet it captures that sense of wonder that every magical garden should have. It’s a fantastic entry point for beginners or a fun afternoon craft for little dreamers.
🌿 5. Glow-in-the-Dark Fairy Trail
As the sun sets, let the magic come alive. This glow-in-the-dark fairy trail adds a stunning nighttime element to your whimsical fairy garden ideas, making your backyard play area for kids a wonderland both day and night. It’s a brilliant way to extend playtime into the evening and add a soft, twinkling ambiance to your garden space.
Why Create a Glowing Trail?
Fairy gardens are already enchanting during the day — but when they glow under the stars? That’s pure storybook magic. These trails inspire nighttime exploration, spark imaginative stories, and encourage families to spend more time outside, even after dusk.
What You’ll Need:
- Glow-in-the-dark pebbles or stones
- Clear sealant or glow paint (if using natural rocks)
- Thin layer of sand or fine gravel (for your trail base)
- Mini solar-powered garden lights (for added twinkle)
- Optional props: “Fairy Crossing” signs, tiny gates, wind chimes
How to Build It:
- Map your trail route — let it snake around flower beds, lead to a fairy door, or curl around a tree.
- Lay down your base layer of sand or gravel to define the path.
- Place glowing stones strategically — they don’t need to be tightly packed. A scattered pattern creates a magical, firefly-like shimmer.
- Add trail decor: use signs like “No Trolls After Dark,” or place a mini lantern or cookie jar at the trail’s end for added storytelling.
✨ Story Idea: The glowing path leads to the fairy queen’s summer cottage, where moonlight tea parties are held every Friday at dusk.
This idea adds movement, light, and narrative potential to your garden. It encourages kids to come back after dinner, flashlight in hand, ready for the next chapter of their backyard adventure.
🌿 6. Fairy Garden With a Real Waterfall
Bring tranquility and movement to your fairy setup with a miniature waterfall — yes, a real one! Whether DIY or kit-based, this feature takes your whimsical fairy garden ideas to the next level, turning your backyard play area for kids into a calming, storybook oasis.
Why Add a Waterfall?
The sound of flowing water creates a peaceful sensory experience for kids and adults alike. It also introduces motion — a dynamic element that makes your garden feel alive and ever-changing. Plus, it becomes a focal point for fairy tales, from enchanted springs to secret waterfall caves.
What You’ll Need:
- Small fountain pump (tabletop or aquarium-style)
- Water basin (bucket, planter, or old wooden tub)
- Flat rocks or slate for water flow
- Tubing (often comes with the pump)
- Decorative moss, bark, or driftwood
- Miniature figures, houses, or fairy bridges
- Access to an electrical outlet or portable power supply
How to Build It:
- Choose your container — a wooden tub, ceramic pot, or wide planter all work well.
- Install the pump at the bottom and run the tubing up through stacked stones.
- Create a rock cascade where water can gently flow back down into the basin.
- Disguise the mechanics using moss, bark, gravel, or mini trees.
- Add storytelling elements — maybe it’s the “Healing Falls” or the “Spring of Eternal Sparkle.”
💧 Garden Magic Tip: Place mint or lemon balm near the waterfall — the breeze will carry their scent for a subtle layer of garden aromatherapy.
Not only does this feature provide visual and auditory appeal, but it also draws people in. Children will naturally gather near it, watching the flow and inventing tales of fairies bathing or collecting magic water for their potions.
🌿 7. Giant Gnome Playground From a 5-Gallon Planter
Turn an ordinary planter into a whimsical amusement park just for fairies and gnomes! This whimsical fairy garden idea invites kids into a world of slides, swings, and towers — all scaled to miniature proportions. It’s one of the most interactive builds on this list, making it perfect for a backyard play area for kids that’s brimming with energy and imagination.
Why a 5-Gallon Planter?
Large planters are durable, weather-resistant, and provide ample space for creativity. Flipping them upside-down or building up from within gives you vertical room to play with — think treehouses, bridges, and multi-level structures.
What You’ll Need:
- A 5-gallon plastic or ceramic planter
- Scrap wood, sticks, and twigs (for platforms and accessories)
- Twine or string (for swings and hanging decor)
- Toothpicks, skewers, or small dowels
- Hot glue, wire, or an awl for assembly
- Miniature playground accessories (swings, ladders, slides)
- Moss, tiny succulents, and other greenery
- Optional: Gnome playground accessory kits for detailed touches
How to Build It:
- Flip the planter upside down to serve as a base “hill” or central structure.
- Add platforms using glued pieces of wood or bark at different levels.
- Create movement — add a swing made of string and bark, or a slide from a curved scrap of plastic or wood.
- Decorate with whimsy — flags, welcome signs, mini benches, or a snack stand (“Acorn Pops, 5¢”).
- Surround it with detail — pebbled paths, mossy patches, fairy lights, or even tiny restrooms if you want a giggle.
🎢 Make It a Story: This could be “Mushroom Mountain Theme Park” or “Gnome Grove Amusements.” A little signage goes a long way in bringing it to life.
This setup invites interaction. Kids won’t just look — they’ll lean in, move pieces, and create their own adventures, over and over again.
🌿 8. Bird Bath Fairy Lake
That old bird bath gathering leaves in the corner of your yard? It’s about to become a whimsical fairy lake — a serene, sparkling centerpiece in your backyard play area for kids. This setup adds elegance and playfulness in equal measure, with room for tiny boats, pebble shores, and floating fairy dreams.
Why Use a Bird Bath?
Bird baths are already designed to hold water, making them the perfect foundation for a fairy-scale lake. They’re elevated, easy to access, and offer a natural boundary that encourages creativity without overwhelming younger kids.
What You’ll Need:
- A clean bird bath (stone, plastic, or ceramic)
- Water (keep it about halfway full for easy decorating)
- Flat stones and bark (for shoreline and docks)
- Moss, sand, or gravel for texture
- Miniature props: walnut-shell boats, tiny benches, fairy signs
- Sprigs of herbs (like lavender or thyme) to mimic reeds
How to Build It:
- Clean the bird bath thoroughly and fill it partway with fresh water.
- Line the edges with stones, moss, and bark — create curves and “beaches” for a natural shoreline.
- Add floating or anchored items like boats, lily pads, or a “fishing dock” made of popsicle sticks.
- Decorate with vertical texture — insert twigs or herb sprigs into the soil around the base to look like cattails or reeds.
- Add signage like “Swimming on Fridays” or “No Splashing After Sundown” for whimsy and storytelling.
🚣 Fairy Bonus Tip: Add a solar-powered water lily light or floating LED — it’ll glow softly at night and keep the magic going after dark.
This peaceful build is one of the easiest to maintain and one of the most visually striking — especially when sunlight hits the water or ripples spread from a breeze. It’s a quiet reminder that even a simple container can hold a whole world of imagination.
🌿 9. Floating Fairy Garden in a Hanging Basket
Add a touch of sky-high magic with a floating fairy garden that gently sways in the breeze. Perfect for porches, pergolas, or even tree branches, this setup brings height and motion to your whimsical fairy garden ideas, and offers a space-saving solution for enchanting your backyard play area for kids — no lawn needed!
Why a Hanging Basket?
Hanging baskets elevate your fairy scene — literally — creating the illusion of a floating island or a treetop village. They’re easy to assemble, great for vertical gardening, and accessible for kids to admire without having to kneel in the dirt.
What You’ll Need:
- A wire hanging basket (with coco liner, if possible)
- Lightweight soil or peat-based potting mix
- Decorative moss (live, faux, or preserved)
- Compact plants: sedum, thyme, or hens and chicks
- Miniature fairy accessories (homes, bridges, flags)
- Bamboo skewers or twigs (for vertical elements like signs or mushrooms)
- String lights or dangling decor (optional)
How to Build It:
- Fill the basket with a lightweight, well-draining soil mix. Avoid heavy clay to keep the structure balanced.
- Top with moss for texture and moisture retention — plus, it hides the soil beautifully.
- Plant compact greenery like sedum or thyme — they’re drought-tolerant and thrive in confined spaces.
- Add vertical flair using skewers with mini signs, mushrooms, or fairy flags.
- Incorporate movement — a hanging teacup swing or beaded wind spinner adds visual interest.
🪐 Imagination Prompt: Tell your kids this is the “Fairy Sky Island” that appears only when the breeze is just right. Or maybe it’s the floating school where pixies learn to fly!
This idea is perfect for renters or those with small yards — no digging, no heavy lifting. And because it hangs at eye level, it invites attention, conversation, and storytelling in a big way.
🌿 10. Backyard Sandbox Turned Fairy Forest
If your kids have outgrown their sandbox — or if it’s just sitting unused — don’t toss it. Reimagine it as a fairy forest, a lush, immersive miniature world full of winding trails, mossy hills, and woodland magic. This is one of the most expansive and interactive whimsical fairy garden ideas, turning your sandbox into a dynamic backyard play area for kids with limitless potential.
Why Use a Sandbox?
Sandboxes are framed, shallow, and easy to shape — the perfect blank canvas for landscaping in miniature. With just a few changes, they become enchanted forests where kids can build, explore, and dream up endless stories.
What You’ll Need:
- An existing sandbox (built-in or freestanding)
- A mix of remaining sand and lightweight potting soil
- Real or artificial moss
- Gravel, bark mulch, or fine pebbles for paths
- Groundcovers like Irish moss, mini ferns, or creeping thyme
- Miniature accessories: forest animals, houses, campfires, signs
- Optional: an overturned clay pot or tree stump as a hidden den or fairy hut
How to Build It:
- Remove some sand and mix in soil for better plant growth, keeping areas of pure sand to shape trails and meadows.
- Design your layout: build small hills, “dry creek beds,” and clearings.
- Plant your forest with low-growing, shade-tolerant plants around the edges and in key focal spots.
- Create texture using bark chips for mulch beds, moss for forest floors, and gravel for paths.
- Add forest features — a log bridge, fairy campground, twig fences, or even a “fairy watering hole” made from an old teacup.
🌲 Pro Build Tip: Use different elevations and zones — maybe one area is the “Whispering Pines” while another is the “Gnome’s Grove.” These details turn your sandbox into a living story map.
This project isn’t just a makeover — it’s a transformation. The sandbox becomes a place where play meets nature, where kids aren’t just making mud pies — they’re building ecosystems, telling stories, and tending their own little world.
❓ Frequently Asked Questions (FAQ)
What age group are these fairy garden ideas best for?
These whimsical fairy garden ideas are perfect for children aged 3 and up, but they’re equally fun for teens and adults who enjoy crafting, storytelling, or spending creative time outdoors. Supervised builds involving small parts are recommended for younger kids.
Do I need a large backyard to create a fairy garden?
Not at all! Many ideas, like the clay pot treehouse or hanging basket fairy garden, are designed for small spaces, patios, or even apartment balconies. Fairy gardens can be as tiny or as expansive as you like.
Can I use real plants in my fairy garden?
Absolutely. Hardy groundcovers like thyme, sedum, and moss work great for fairy gardens. You can also mix in faux greenery for low-maintenance options. Just be sure the plants suit the light and watering conditions of your space.
How do I make my fairy garden last through the seasons?
Choose weather-resistant containers and durable materials (e.g., rocks, treated wood, resin miniatures). Store delicate elements indoors during harsh weather. In winter, consider creating an indoor fairy garden or switching to cold-hardy decor.
Where’s the best place to build a fairy garden in the yard?
Look for visible, semi-shaded areas where kids can safely access and interact with the space — along pathways, near porches, or beside existing flower beds are ideal. Avoid deep shade or heavily trafficked areas.
Can fairy gardens be educational for kids?
Yes! They teach basic gardening, spatial design, storytelling, and even ecological awareness. Plus, they encourage imaginative play, which is crucial for child development.
🌿 Conclusion: Let Imagination Take Root
Each of these whimsical fairy garden ideas has the power to transform overlooked backyard corners into hands-on, story-rich playgrounds where creativity blossoms. From repurposing a sandbox into a lush fairy forest to laying out glow-in-the-dark trails and crafting miniature twig bridges, these garden projects turn everyday spaces into enchanted escapes — designed to delight and inspire.
A truly meaningful backyard play area for kids goes beyond fun. It fosters connection — with the outdoors, with creativity, and with the quiet, curious part of ourselves that still believes in fairy tales. Whether you’re blending in walkable ground covers or pairing fairy scenes with flower bed ideas, your garden becomes more than just a yard — it becomes a living storybook.
So go ahead: sketch a fairy trail, plant some creeping thyme, hang a lantern under the branches, and open the door to magic. With a little intention and these whimsical fairy garden ideas, you’re not just decorating — you’re cultivating wonder.
🌿 Love gardening inspiration? Follow me on Pinterest for bold plant ideas, tips, and seasonal color!
More Posts
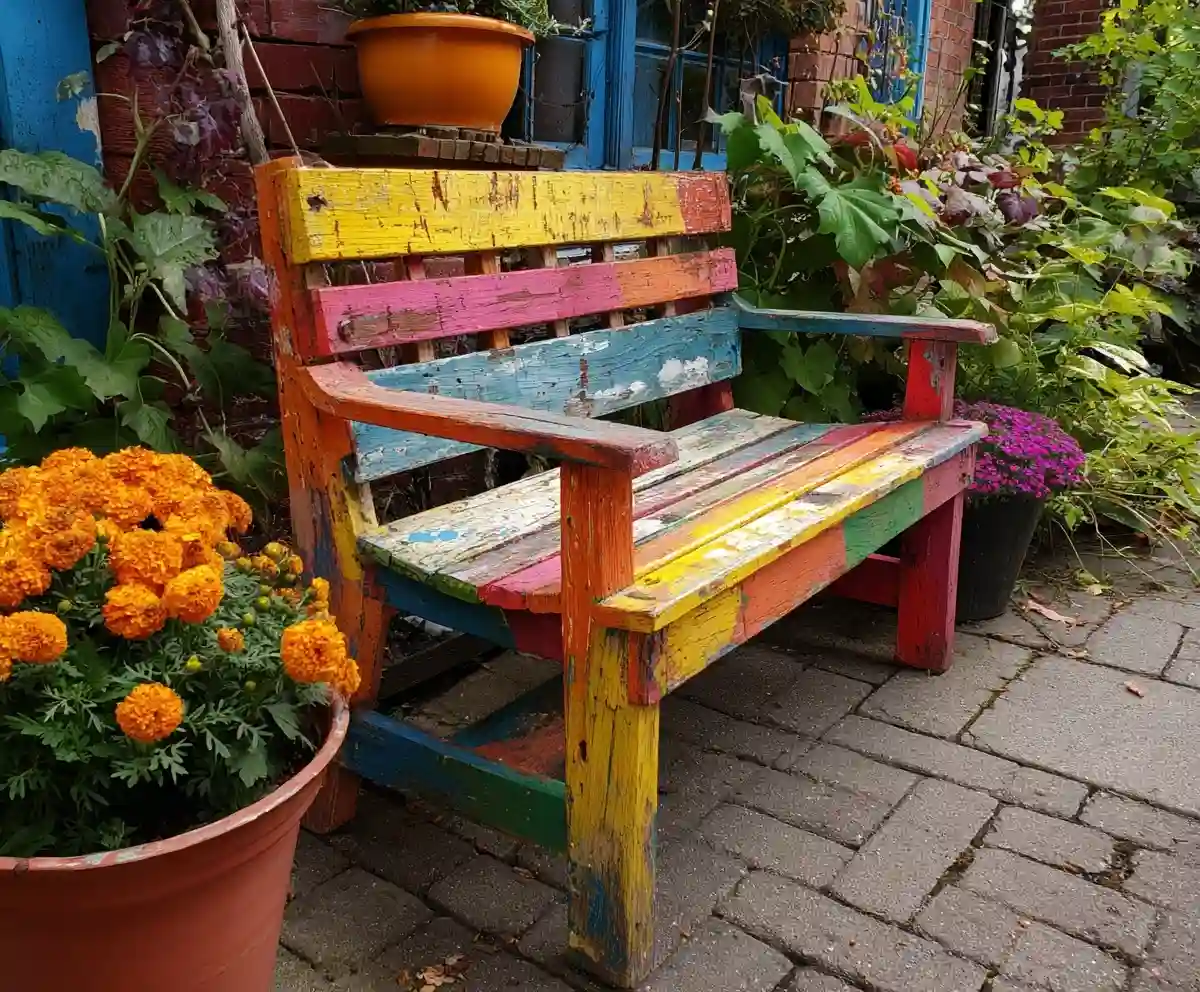
19+ Budget-Friendly Backyard Makeover Ideas
Backyard makeover ideas can turn even the most ordinary outdoor space into a warm, inviting retreat—without draining your wallet.
Read More →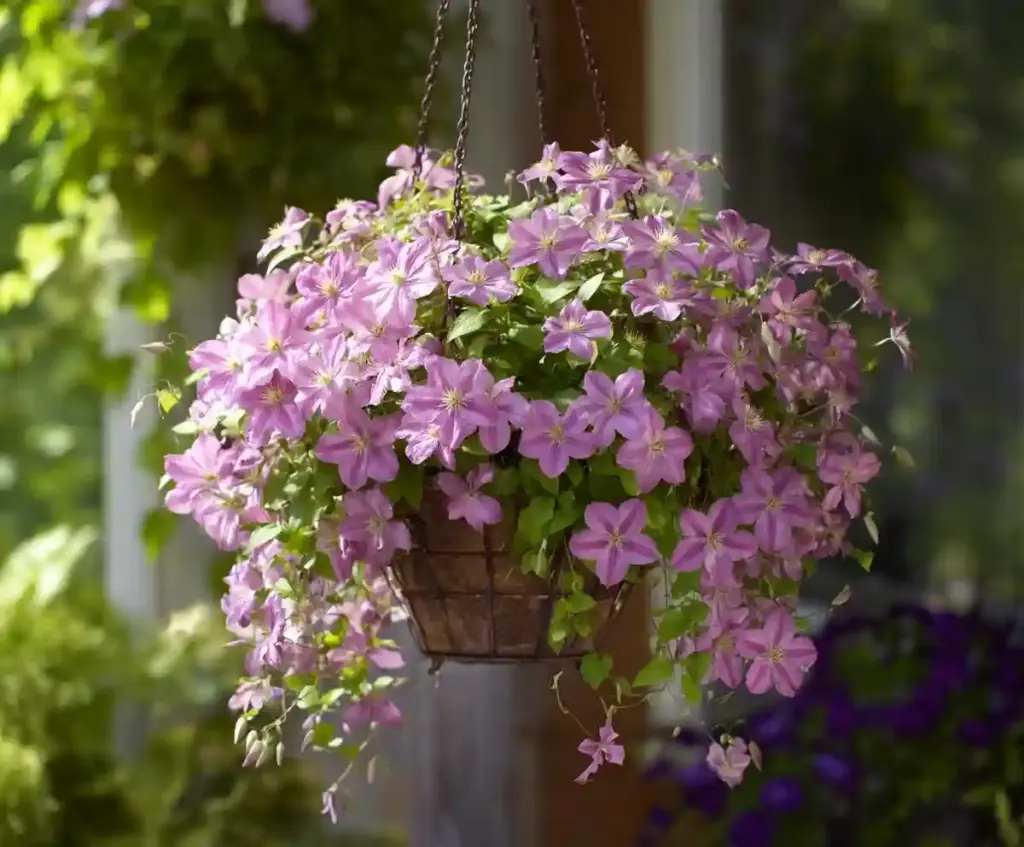
21 Stunning & Simple DIY Clematis Trellis Designs
DIY clematis trellis designs are a beautiful way to blend creativity with function in your garden.
Read More →
12 Full Sun Perennials That Bloom All Summer
Explore a selection of hardy perennials that flourish and bloom beautifully in full sun throughout the summer.
Read More →
Houseplants for Living Room
Find the perfect houseplants to brighten and purify your living room while adding a touch of nature indoors.
Read More →
Backyard Play Area for Kids
Create a fun and safe backyard play area for kids with these inspiring design ideas and tips.
Read More →
Top Privacy Trees
Discover top tree varieties that provide natural privacy and enhance your outdoor space.
Read More →

